Thursday, August 29, 2013

Feathering My Nest

We are very happy to have replaced the old, nasty refrigerator that came with our house. Because of space limitations, I did not have a lot of options when considering the new purchase. I did want stainless steel, so we ended up with only one option that would fit our space. Even though we'd  measured the space carefully, and made our choice based on the published dimensions of the refrigerator, it was still too tall for the space. (Our measurements weren't off, the dimensions given were not right.) Aargh! We're going to have to hire someone to come in and do some carpentry work to make things fit. So, in the meantime, we'll live with a refrigerator that sticks out too far into the room. But that's really another story. I'm not actually writing about that at all today!

Today's post is related, though. I promise. Here's how: now that we have a stainless steel model, I no longer have any magnetic surface to use. For years I've kept a magnetic shopping list as well as a container for pens on the front of the fridge. Not to mention random magnets holding up coupons, etc. I know it's not a very sleek look, but it worked. Now I have no shortage of sleekness, but where in the world am I going to keep those things I use daily??

What I do have is a pantry door that has a panel on the inside that was going to waste. I'd read about people making their own magnet boards, so I thought I'd give it a try. I did some research and found that galvanized metal is magnetic. So off I go to the hardware store with a magnet in my purse to test it out. I went to one of the big box stores, where the employees don't always have the level of knowledge that helps ignorant customers like me. I got plenty of blank looks, and was sent all over the store, finally being led to a spot where thin sheets of metal were located. I pulled out my handy dandy magnet, and it worked! I found a piece that was the perfect width, and long enough to hold my list and pen caddy. Here it is:


I'd already decided I wanted a bright yellow, so I bought this:


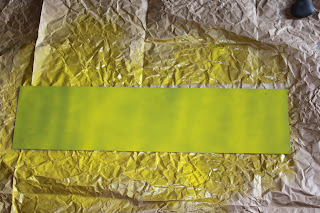
I spread some paper on the garage floor and got to work. It took MANY, MANY, MANY coats to cover the gray and get that bright yellow I wanted.


Unfortunately, I got some overspray on the garage floor, but I didn't let that worry me. It's only the garage floor, right honey? I let it sit for a couple of days, then brought it into the house. I wanted to finish the edges in some way, so I thought washi tape would be the answer. I LOVE working with washi tape! It comes in so many colors and designs, and is so flexible and easy. I found some blue chevron tape in my studio, which seemed exactly right to me. Here's how it turned out:


I like seeing that punchy yellow every time I open the pantry door! I'm pleased with the end result, although I have noticed to my dismay that the magnets are sticking to the painted surface. If I try to take them off, the paint is going to be damaged. Bummer! I don't know if it's a problem with my technique or if a different brand of paint would have performed differently. At any rate, now it's so convenient to keep my grocery list going or grab a pen to put something on the calendar.

Till next time,
Immi


Wednesday, August 21, 2013

Feathering My Nest

Hello! I can't believe it's been so long since I last posted, but I'm ready to start getting back into it. Having recently moved, I'm still hard at work thinking and imagining how to make this new home reflect our tastes without breaking the bank. I've been having some fun with small projects to accomplish that goal, so as I complete things I'll share them with you.

First up is a project that I like to think justifies a habit that doesn't make any sense to my DH (dear husband). Now he doesn't go to a store unless he has a specific goal in mind; I love to browse and see what catches my eye. Many months back, before we knew we were moving, I had picked up a rub-on wall decal meant for the kitchen. It was on clearance, so I didn't feel bad about spending a few bucks on it even though I wasn't exactly sure where I wanted to use it (another thing that DH doesn't understand!). When I got it home, I found a place that it would work, but for some reason I never got around to using it. So, of course, I packed it up and moved it across the country with me!

My new house has lots of cupboards, but almost zero blank wall space. Great storage, but little room to decorate. So the package with the decal sat on the counter for a while, taunting me to find a space and use it. Looking around one day, I noticed that I had one upper cabinet that I thought had enough space on the door for the decal. A quick measure confirmed that it would fit. I should mention that the cabinets are all painted a glossy off-white, so the decal which is wood-toned, would show up well.

Here's the before picture:


I pulled out the decal, and read the directions carefully. The box came with the decal cut into strips and an applicator for adhering  it. After washing the cabinet door and drying it, I taped the sections to the door, and started slowly rubbing it on. It was a little tricky to work with, as  once the liner is removed, you really can't reposition it if you don't like the placement. I ended up with some bubbles that I tried to remove, not altogether successfully.

Here's the after photo:


If I look closely, I can see the imperfections, but all in all, I'm quite pleased with the way  it turned  out. It was inexpensive and fairly quick and easy - all good things! If I ever get tired of it, a hair dryer will loosen the adhesive and  it should come off cleanly (at least that's what the package promises!).

I do love feathering my nest!
Immi