Saturday, December 31, 2011

A Fresh Start


I'm sure I'm not alone in spending some time at the end of the year in cleaning and decluttering. Being on the cusp of a new year, it seems fitting to freshen things up a bit. I spent some time the last few days attempting to sort, clean, and reorganize my craft room. I'm a collector of stuff, and boy do I have lots of it! Some of it I've moved across the country a couple of times because You Never Know! When it reaches the point that I can't function any more, something's got to go. I forced myself to get rid of things I know I'll never miss. For example, I've held onto a good-sized stack of hard back book covers, because I like to use them as a canvas. It dawned on me that it's hardly worth having them take up space when I can get a book for 15 cents from the bin at Goodwill. I think my space is worth that, not to mention the emotional heaviness that I find comes from too much stuff.

While cleaning, I also looked for new ways to store some items that hadn't found a permanent home yet. This little overnight case belonged to my grandmother. My sister brought it to me a few months back, along with many other treasures from the past. (Thanks, Ann!) It sat in my room since then, lonely and without a purpose in life. It occurred to me that it would be just the right size to hold several large spools of baker's twine I had bought online recently. I cleared out a space on a shelf that seems made for it, and now I can use it and enjoy thinking of my grandmother each time I see it and open it up.

I also love labeling things, but I didn't want to use my labeler with the sticky tape on this lovely vintage case. I remembered some decorative paper tags I bought (you never know), and pulled one out. I used one of my favorite alphabet stamp sets, and a little baker's twine to tie it to the handle. Form and function, all in one!

I hope 2011 ends well for you! 2012, here we come!
Immi

Wednesday, December 7, 2011

Gift Bags


I can't believe how long it's been since I've posted anything. Naturally I'm crazy enough to try to get it going again in December. It will be interesting to see if I can manage any more this month. I started this post quite a while ago, but left it hanging. So without further ado...

Creativity interests me, but I don't really understand how it works. I see projects that others have done, and I think "I could never have thought of that!" I wonder how much of creativity is derivative. I know that soaking up the ideas and work of others can spark something seemingly unrelated in me. Or perhaps I'll start with their idea, but make it into something that reflects my own vision.

This project began from an idea I'd seen that I filed away in my mind to try sometime. I've become slightly acquainted with an artist who lives in Florida because I stumbled on her blog. I read her profile, and realized that we had the same church in common. I don't know too many people who like paper art the way I do, so this was intriguing. She has been published many times, and runs her own online business. Occasionally, she will post a video tutorial and that's where these bags enter the story. You can see the original tutorial here.

I watched the video, and loved the idea. It combines sewing, paper, and using up odds & ends. What's not to love?! Like many ideas I think are awesome, however, it sat unused for a while in a dusty corner of my brain. Sometimes I get aggravated with myself because I seem to collect ideas more than execute projects.

When I had some friends over for a jewelry party, I wanted to present the invitations in a fun and (dare I say) creative way. I thought that the folded invitations would fit into these cute little gift bags.

Now, this is what I call fun! First, of course, I had to run out and buy the bags. No luck at Target, but Walmart came through for me. Then I gathered up random pieces of paper, ribbon, fabric, buttons...whatever I thought I could sew or glue down. I grabbed whatever was handy and started sewing. It was hard to stop, so I did end up with a few extra. I think they'd be a great holder for a special card that can be hand delivered.

Happy December!

Wednesday, October 19, 2011

More Fall Decorating

Here are some additional photos of my preparations for the party recently. The first photo shows my el cheapo fake pumpkins in their "before" state.


As you can see, they were not much to look at. But, they were so cheap that I had no trouble experimenting with them. Here's an "after" picture:


I had lots of fun with metallic acrylic paint, glue and torn book pages. On a few, I broke off the stem and glued a vintage button in its place. Some of them turned out better than others, so I may have to play around a little more. I think my favorites are the ones covered with book pages.

The wire basket is new: I found it at Walmart. The tag attached to a gourd is one I made from a small shipping tag. Shipping tags are so much fun to use! They are so inexpensive and available at any office supply store. Just a little ink and some stamps completely transform them into something special.

Last, but not least, I love the way the front porch turned out. I was inspired by a friend's display on her porch. She has a bench and had placed plants, pumpkins, and gourds on and below the bench. While I don't have a bench, I knew the key would be to have a variety of colors and textures at different heights. Thrift stores to the rescue! I found a small, backless wooden bench and a metal pot stand to help out. I already had a small decorative chair that had been sitting on the porch all summer (can you guess where I got it???).

I went to my favorite local garden center (yay Gertens!) and picked up pumpkins, gourds and mums. Here are the results:


Saturday, October 15, 2011

Fall Decorating

There's nothing quite like a deadline to get me moving. Several weeks ago, I agreed to host a jewelry party in my home. This meant, of course, the obligatory cleaning of rooms nobody is going to see - just in case, you know!

It also meant that it was high time I decorated for fall. I don't have a lot of fall decorations, and they always seem a little pathetic to me. I decided that this year, I'd try to step it up a notch. If I were smart, I'd be thinking about this for a few weeks ahead, doing a little shopping here and there. But that's not the way we rock and roll around here. No, I did nothing until the week before the party, with the bulk of it left until the last couple of days.

During the week ahead, I started keeping my eyes open for things I could use. I did end up buying some things, but I was also able to utilize items from around my house. These pictures show what I did in my dining room.

I've got a metal corner stand with four shelves. One of these days I'm going to spray paint it black, but I didn't get that done this time. I left the top shelf the way it was and had fun arranging things on the other shelves. The next shelf down holds a yellow wire basket I bought a while ago at a thrift store. The cloth pumpkins were a craze I went through last fall. I added the "welcome" sign using Scrabble tiles.

The next shelf has some old and new items. The pumpkin at the back is a fake which I left as is. The pumpkin in the front is also fake; I glued torn strips from an old dictionary on it. The books are from a thrift store as is the nut grinder. The other things I've had for a while; they usually live somewhere else.


On the bottom shelf, I left the large yellow urn, but pushed it to the back. You can see more fake pumpkins and gourds in a wire basket I got at the dollar spot at Target. If you look closely, you can also see an old whisk broom peeking out - a recent thrift store find.

I've got some other pictures showing more about the fake pumpkins as well as the decorations in the kitchen and living room. For once, I'm quite happy with the way things turned out. And, best of all, now that the party is over I can enjoy these decorations for weeks to come!

Till next time...


Monday, September 26, 2011

Fabric Wristband

I've seen so many cute DIY fabric wristbands out in the blogosphere! I've been meaning to give it a try, so I pulled out some materials and got busy. I decided I wanted to use unbleached muslin with the end result being a white on white band. I cut three strips of muslin plenty long enough to go around my wrist.


I had a pile of random skinny strips and threads left from tearing muslin for another project. The shape reminded me of a rose, so I thought I'd make that the base of a flower.


Then it was off to the sewing machine, where I stitched the three strips together along the sides, leaving the frayed edges as they were. I stitched "channels" down the length of the band. Next I roughly stitched the tangles to one end of the band. Under the "flower" I tucked a strip of twill tape to act as a loop closure.


Next I added some ribbon and rickrack to the flower to make it more interesting. The flower center is made from twine glued to a cardstock circle. I chose a white button in the shape of a rose and stitched that in place.


Here is the final result - I'd show you the photo I took of my arm modelling it, but I was appalled at how wrinkled my arm looked in a closeup shot! You'll just have to imagine it and think kind thoughts about my elderly arms. ;)


Fun and easy-peasy!

Till next time...

Friday, September 23, 2011

A House Full of Memories

 I've had these photos for a while, waiting to decide how to use them. Normally, I don't write much for my scrapbook pages. I find that the photos themselves are enough to bring back the memories. In this case, so many things started popping into my mind that I decided to get them down on paper. Here is the journaling:


The last time I saw this house, Mike and I drove out there with Daddy Clyde. He stayed in the car while we took a look around outside and peered into the windows. When we returned to the car, Daddy Clyde commented that I’d never been turned away from that door before. That remark really hit home and I’ve thought about it many times since; I’m not likely to enter that house ever again.

I have so many memories that were made in this house. Memories of holidays and family visits. A broken chair and a twice-broken window. Delicious meals. Lizzie’s placemats under Nanny’s everyday plates and Fostoria glasses. Jelly served in glass bowls. The board games in the hall closet. The patio that became the “garden room”. The mesquite and pecan trees. Nanny’s rose garden. The metal and stone fence. Fossilized wood and driftwood. The big round coffee table with the fancy flower arrangement and candy dishes. The painted rock that sat by the front door. Artwork collected from around the globe. The pantry in the kitchen with the sliding door and the pencil sharpener inside (what a fun, cozy place!).  The boat that sat in the garage. Scorpions in the light fixtures – ewww! Fabric covered walls. Nanny’s heater in the back room and stacks of books for her to read. The two blue chairs.

I’m going to miss it.


Wednesday, September 21, 2011

Instant Rust


Generally, I tend to think of rust as something negative, caused by neglect or carelessness. In spite of that, I have a fondness for the look of a rusty patina - I just don't want to have to deal with nasty flaking metal or unsightly stains.

Enter instant rust! I saw an idea I wanted to try here. The blogger, Carolyn, cited this website as a source for the images she used. Although I had come across that site before, I'd never done more than a little browsing.  (All the images are available for free download). I decided to give her project a try, and downloaded this image. I printed it on our color printer and cut it to the size I needed for my can. Before doing any gluing, I dabbed some Adirondack Alcohol Ink in ginger to the top and bottom rims so the shiny silver metal wouldn't detract from the rusty paper.

I'm not a big fan of Mod Podge, which was recommended to glue the paper down. Instead I used Perfect Paper Adhesive which worked very well. Following the instructions on the blog, I brushed glue on the can in small sections, securing the paper as I went. I found that running my nails lightly along the can's grooves did the trick to get the paper down into those ridges. I overlapped the paper a little at the end, and brushed a small amount of the glue over the join to make it more secure.


Just for fun, I tied some rough twine around the finished can, and topped it with a flower I made. The outer part of the flower is made from a torn strip of unbleached muslin gathered with a rough running stitch. For the center, I punched a circle from a piece of cardstock. Next, again using the PPA and starting from the center of the circle, I glued the twine down, bringing the tail around to the back. I secured the center to the muslin with Diamond Glaze, a very strong adhesive. I also used the DG to attach the flower to the can. All done! Now I only have to decide whether I want to use it for pens and pencils or perhaps some artificial flowers.


Till next time!

Monday, September 19, 2011

Living and Active


You may remember a while back that I posted a preliminary sketch for a piece I planned to submit to Somerset Studio magazine. I did mail it in, but I haven't heard anything yet. I hope that means that it will be used in some way, but it may just be that they're still going to return it with a polite rejection letter.

This is the finished work and I'm pretty pleased with the result. I ended up cutting out the sketch rather than drawing a new one. I painted the "vine" with layers of color and set it aside. The background paper is a nice watercolor paper that stood up to lots of splashing and spraying. Once the vine was glued in place, I added the text from Hebrews that originally inspired me. That was printed on the computer and cut apart.

Next I selected portions from the prologue of John's gospel. I hand-wrote those around the edges of the vine. The Roman numerals along the edges represent the Ten Commandments.

The bottom layer is a canvas panel, painted a darker green and splashed about. The blue "ruffle" is plain old tissue paper that I painted with a wonderful acrylic paint made by Lumiere. Their paint is beautiful and remained flexible when dried. This allowed me to fold it into rough pleats and stitch it to the watercolor paper with my machine.

Apart from the pressure of making something I thought was worth submitting, this project was completely pleasurable. Of all the artsy or crafty things I've tried, messy painting is the most fun for me. I'll let you know what happens as soon as I hear anything.

Till next time!

Wednesday, September 14, 2011

Curious

For a long time, I've wanted to use this photo in a layout. I get tickled every time I look at it. I love her plump little arms, and her precious bald head. From the expression on her face, it appears that Norah has been "caught" doing something she shouldn't, but she was just idly opening and closing the cabinet door. She didn't even try to get anything inside - what a good girl!

This was one of those occasions when the whole family was together. There was no shortage of people willing to play with and hold the grandkids, and lots of game time and visiting for the grownups.

This page was incredibly easy to do. I found this beautiful paper with the black trim and stitched flourishes, so all I had to do was add the photo, the heart embellishment, and a title. It doesn't get much easier than that!

Till next time :)

Monday, September 12, 2011

We Miss You

This page is from the challenge Sketch of the Week. I have enjoyed picking mostly random photos to use as I've worked my way through the challenges. I like the look of paper layers, although I have a hard time making it work. I decided to use mostly black, which I don't do very often. I like black a lot as a thin, secondary layer behind other papers, but it was something new for me to use quite so much of it.

There's a lot for me to like about this photo! Jenna enjoys experimenting with photography, and this is such a cute idea. I really like the happy, excited expressions on everyone's faces. Aidan has a marker in his hand, as if he's just finished putting the final touches on the message. Norah's arm is draped across the top of the board in a pose that is completely natural and relaxed. Jenna's sunny personality comes through so clearly. I really appreciate that she took the time to set this up - thanks, Jenna!

Scrapbooking is a great way for me to experience emotions again and again. I love this hobby!!

Till next time...

Tuesday, September 6, 2011

Blast From the Past

This is my take on the Go Retro Challenge. I recently got these photos when one of my sisters came for a visit, and it was really nice to have an opportunity to use a couple of them right away. These were taken on a family trip to Oklahoma.

We've got it all going on here. Masculine derring-do, and feminine relationships! The photo on the left is a three generation photo. I always think it's special to see families represented this way. The photo on the right shows my son being his typical boy self - love that!

Now that I'm looking at this again, I'm not sure about those green half circles. A little too Mickey Mouse, maybe? I'd have to hate it a lot, though, to go  back and change anything. Most of the time, I accept what I get  and go on.
Here's to enjoying all those great family photos!

Friday, September 2, 2011

The Gift of Art

I originally wrote about this piece of art here. I've had this on my desk at work since then. This morning, we were registering students for our ESL (English as a Second Language) program. A young Asian woman was there, helping her mother go through the process. After her mother had finished the reading test, she and her daughter were at my desk. I matched up the mother's test score with the proper class, filled out the paperwork, and explained everything to them.

When I was finished, the young woman pointed to the canvas, asking me if I had made it. I told her I had, and she asked me about the frame. I picked it up to show her that actually there was no frame, only a canvas. She admired it so much, that I was moved to offer it to her as a gift. She was taken aback, but when she saw that I was sincere in the offer, she smilingly accepted it and thanked me profusely.

It was so gratifying to know that this thing I had created would make someone else happy. Her spontaneous admiration and pleasure assured me that she would enjoy the gift. For me, giving art can be stressful (self-induced, of course!!). In this case, though, the giving was untainted by any sense of the recipient feeling obliged to "like" the gift. She so obviously liked it, and I'm so glad I followed my impulse to give it away. It's nice to think that it has a new home!

Till next time!

Thursday, August 25, 2011

Sweet & Sassy

Well, folks, here we are again with another layout. The challenge deadline has passed, but I'm still planning to work on those prompts. It's been fun to add new pages to my scrapbooks.

The name of this challenge is Hot Pink Hoopla. I thought this summery photo would work so well with a blast of hot pink! I think this layout turned out okay, but not one of my best. Something about the tag is not quite right. However, I'm perfectly comfortable with the fact that not every page can or should be stellar. For me, the point is to have fun and to capture a memory.

Norah has a sweet, sparkly, fun-filled personality. (The word "sassy" in the title is meant only in the best way. She's not naughty sassy at all!)

Till next time!

Monday, August 22, 2011

Grandparent Love

This layout is for the Signature Accent challenge. I was stumped at first, thinking that I don't really have a signature accent that I use on each page. It dawned on me that my pages do have recurring elements, so I decided to go with that. I used my favorite paper line, Basic Grey. They offer beautiful patterned paper! I also used a favorite technique: inking. Most of the paper I use has inked edges. I like the way it helps things stand out against the background. Next, I chose my tried and true favorite shape, a scalloped circle. Marvy Uchida makes several sizes of scallops that can stand alone or be layered - love their punches the best!

Normally, I don't go in for oval shapes in my photos - that's very "old school"! But in this case, I did have an oval frame left from the front of a pad of decorative paper I'd bought. I cut out all the pretty parts from the cover that I thought I might someday use, and stuck them in my drawer units that I keep for small scraps of paper. The frame seemed just right for this, so being the greenie that I am, I enjoyed finding a use for it! I also used a couple of rub-ons, which can be fabulous or terribly frustrating. I've learned that it pays to buy quality rub-ons - the cheap ones will just make you mad, and you'll end up throwing them in the trash!

I noticed with this layout that I'm seeing a lot of the same placement of photos and elements on my pages. I seem to gravitate towards that lower right-hand corner of the page. I guess that means that I'll have to work extra hard to keep from getting into a rut! I've still got several challenges to go, so I'll have to try to mix it up  a bit.

Till next time!

Saturday, August 20, 2011

Summer Love

This layout is a result of the Chop Your Paper challenge. The guidelines were to use one or two sheets of paper without any additional embellishments. This was a hard one for me, but I'm pleased with the way it turned out. I cheated by using some alphabet stickers, but the rest is paper and ink. (All the paper edges are inked.) I also used a couple of punches to make the scalloped circles - Marvy Uchida makes really nice punches that are easy on the hands.

I don't know why kids love sunglasses, but I've got some great pictures of my grandkids posing in sunglasses. Maybe it makes them feel grown up to wear them. Norah certainly seems very proud of herself, posing with Mommy.


My goal is to get through all these challenges; I will have quite a few pages to add to my scrapbook by the time I'm done!

Till next time!

Paper: Basic Grey, Echo Park
Alpha: K & Company
Ink: ColorBox
Punch: Marvy Uchida

Thursday, August 18, 2011

He's Jolly

Here's another layout based on a challenge. You can read the original post here. The challenge was to use only half of your paper, leaving plenty of space for the eye to rest. This has been a popular approach to scrapbook pages for a while, although there are still plenty of pages with multiple photos and little "wasted" space. I also used another popular technique here of clustering accents.

I like this approach for a couple of reasons. It's pleasing to my eye, and allows a single photo to be the focus. Sometimes you want to tell your story with only one photo, as is the case here. I love this photo of Isaac. I think it shows so clearly the resemblance he has to his daddy's side of the family. Something about his expression really makes me think of one of his cousins.

It's so much fun to scrapbook photos of children! They have such cute expressions on their faces. Seeing this just makes me want to squeeze that boy!

Till next time!

Paper: Basic Grey, Bazzil, Cloud 9, Unknown
Alpha: Making Memories
Ink: VersaMagic
Punch: Marvy Uchida
Tape Measure Accent: Somerset Studio


Saturday, August 13, 2011

Sugar & Spice

Sometimes a challenge is just what I need to get going. I've really been out of the habit of creating scrapbook pages. I find that the hardest part is getting started. If I wait until I'm "in the mood", it's so easy to put it off.

I came across a challenge on this blog to use stickers from more than one line on the same layout. Stickers have been in and out of popularity with scrapbookers. In the early days of current scrapbooking (people were keeping scrapbooks long before my time), stickers were used with great abandon. I once saw the phrase "sticker sneeze" to describe that approach, and it fits perfectly. I've done many pages that way myself!

I've wanted for some time to create a page around this photo. She has such a sweet expression here, and the backdrop of flowers is perfect. I'll be linking this post to the challenge just for fun, so I will list credits below for the products I used.

It's amazing what fun can be had with a few stickers and some paper!

Till next time!

Products used: Paper by Bazill and Artist paper courtesy of Stampington & Co.; Stickers from Deja Views, K & Company and Creative Imaginations; Metal "bliss" accent from Marcella (K & Company); rub-ons unknown.


Friday, July 29, 2011

Art Smarts

Sometimes I think that there is no limit to the lessons I have not learned. This in spite of enough years to have learned some of them, one would think. Do you remember the Preliminary Sketch I wrote about recently? I've been working hard to make that into a finished project. I've been doing a lot of paint and ink layers to create a background, adding the text I want, etc. (More on that to come.)

The last little bit I need to finish is the substrate to which I will attach everything. I decided to go with a canvas panel. These are inexpensive (I like that!). They also work well for gluing something down, as there is no "give" like a regular canvas would have. I think I've got the color I want on it, but I thought I'd add some splatters of white. It didn't dawn on me until too late that repeated hard strikes with a paintbrush on my finger wasn't a great idea. I noticed immediately after I finished that my middle finger hurt. Upon closer inspection, I saw that I was bruised and swollen from the abuse I'd dealt myself. I wonder how typing will feel tomorrow when I'm at work???

I'm left with the inescapable conclusion that art smarts and that I lack "art smarts"!

Until next time, be safe out there!

Wednesday, July 20, 2011

Scrapbooking Video


I regularly read the blog of a well-known scrapbooker,  Ali Edwards. Ali has a very down-to-earth approach about scrapbooking and is very passionate about telling your story. Most of her work focuses on the every day occurrences of life. I came across this video on her blog today and really enjoyed it. It's somewhat long, but I thought it worth sharing. I think this captures the heart of scrapbooking and creates freedom to enjoy this hobby without pressure. Enjoy!

Wednesday, July 13, 2011

In Praise of Ironing

I bought some fabric the other day for a project I've been meaning to do. Now, generally speaking, ironing is not one of the things I'd put on my bucket list. I will pass over a blouse in the closet waiting to be ironed any day of the week. There's something about ironing cotton fabric, though, that I really enjoy. When I wash new fabric, I like to take it out of the dryer while it's still a teeny bit damp. When that nice, hot iron hits it, the steam rises and I can hear it hissing as the moisture evaporates. And the smell! I don't know what it is, but the fragrance that cotton gives off when it's ironed is delicious. It's intriguing to watch the color of the fabric change ever so slightly as it dries under the iron. The wrinkles are smoothed out, and the fabric is lovely to the touch. I enjoy lining up the selvedges and folding it carefully to put away until I'm ready to use it. Ahh! What a great simple pleasure!

Wednesday, July 6, 2011

Preliminary Sketch

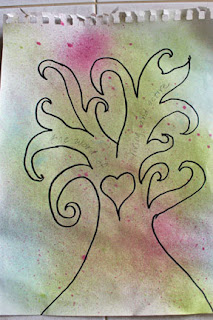
Somerset Studio (one of my favorite artsy magazines) regularly encourages submissions of art work from readers. In the back of the magazine, there is always a page with themes that are going to be used in the months ahead. Recently, one of the themes got my attention: the power of words. I immediately thought about the verse in Hebrews that talks about the word of God being living and active. I got a picture in my mind of a vine, and thought it would be interesting to pursue the idea. Here's a preliminary sketch of what I'm thinking.


The idea I had is of a rather free-flowing, kind of crazy vine, with a part of that verse written on it. In the middle, I'm thinking about using "YHWH" rather than "God" - possibly using Hebrew letters. I'll definitely need some assistance with that!! I think the vine would be cut out and collaged onto another surface, but I'm not sure yet what I'll use as a substrate - maybe a canvas. I'm thinking about submitting it just to say I did. I've been promising myself for some time now that One Of These Days I would do just that. I'll keep you posted!

Wednesday, June 29, 2011

Thrift Store Thursday

Hello, I'm back with another installment of thrift store goodies. There are a couple of thrift stores near my workplace, so occasionally over lunch I'll take a quick run through one of them. Recently I found this:


Now why, you may ask, did I buy this? Is it because I collect this pattern and had been longing to find the last, elusive piece to complete the set? Sweet thought, but no. Perhaps I know someone else who broke her sugar bowl? That would be noble, but again no. Of course! I collect sugar bowls, and thought this would be a nice addition? Nice, but wrong again.

The reason I bought this sugar bowl is because a while back, I thought it would be fun to gather, bit by bit, a mismatched set of china. Pick up nearly any copy of Country Living magazine and you'll see what I mean. Tastefully arranged tables for tea parties or summer luncheons all with mismatched china, glassware and silverware. Now it becomes clear to you. You imagine me sending out carefully handcrafted invitations and thoughtfully choosing my menu. The morning of the party, I go into my English country garden and select the freshest flowers to fill my mismatched vases. The table is laid with vintage linens, and my reclaimed china. My guests arrive, and we enjoy a leisurely afternoon, sipping freshly squeezed lemonade and eating buttermilk cake adorned with lightly sweetened berries and topped with a dollop of hand-whipped cream. Lovely, isn't it?

[Insert crash back to reality]

Actually, I'll probably just have fun with them here at home, using them whenever the mood strikes. So far, I only have a few plates and a sugar bowl. Not exactly impressive, but every collection starts somewhere!

Monday, June 20, 2011

Doodling

I used to think that doodling was hard. I'd look at that piece of paper, and nothing would happen. I would manage silly looking boxes or arrows, but it never looked interesting at all. I don't know what got me started on this idea, but recently I looked up "doodles" on the Internet. After looking at a few, I thought I'd give it a try. So I got out a sketchbook and a pencil and away I went. I found that the more I doodled, the easier it seemed. I spent most of that evening having such fun, just messing around. 

Black & White Doodle
The next day we were leaving on a trip to attend our grandson's birthday party. I took my sketchbook along with some colored pencils, and amused myself doodling some more. The coloring was enjoyable, but it's rather hard on my shoulder and wrist. (Maybe several hours doing something so repetitive wasn't the smartest idea!) 

Crazy Flower (can you see the doodle birds on the next page showing through?)

Rather than adding color after drawing, on the next doodle I decided to add color to the page beforehand. I sprayed it with some spray inks and let it dry thoroughly before doing any drawing. This one isn't complete yet. I decided to live dangerously  and draw this one with a Sharpie marker rather than pencil. I guess the worst that can happen is that I don't like it and rip out the offending page. I think that for me, the secret to doodling is to start with a large shape or two and go from there. Just getting something on that blank page is a good jump start. I'm thankful that something so simple can be so enjoyable!

Work in Progress


Monday, June 13, 2011

Without Ceasing

Here is another of the pieces I made while the energy was burning high. I've had a lot of phrase snippets floating around in my head that I'd like to get into concrete form, so I expect that this may turn into a series. These bright colors seem exactly right to me just now. So much of what I've done in the past has had an old world feel. I still like that look a lot, but maybe the warmer weather is influencing me in color choice. I could spend hours layering paint and ink! There is really no way to mess this up - you can always cover everything with a fresh layer of paint. I like the depth that comes from peeks of previous layers showing through.

"Without Ceasing" and "Stand  Firm" were both done on canvas, utilizing miscellaneous papers glued down as the first layer. I've also done this technique before on the covers of discarded books. I love the idea of breathing new life into something that otherwise seems of little value. Yet another way to recycle! It occurred to me the other day that I could do the same thing while leaving the book intact. I'm excited to give that a try to see how it turns out.

I've toyed with the idea of setting up an Etsy shop to see if anyone would be interested in purchasing any of my work. I also would like to donate some pieces to the annual camp auction for Flaming Pine Youth Camp. I have given previous pieces as gifts, but I always worry that the recipient may feel obligated to "make nice" while cringing inside!

For me, this represents a beautiful string of pearls. Everything about this art exploration makes a happy song in my heart!

Thursday, June 9, 2011

Staking a Claim

A few evenings ago, I got together with some of my co-workers for a "Welcome Summer" evening. We've had a long, cold, damp spring here in Minnesota. Everyone is ready for some warmth and sunshine. We had fun eating, laughing and talking. Our hostess likes to pose an interesting question for her guests. We began to discuss what we would be doing if we could choose any career. It was very interesting to gain insight into the dreams of others. Some of those dreams have been realized, but some have been left behind with little thought of trying to reclaim them.

As soon as the question was presented, almost without thought I said I would be an artist. One of the women present began talking about finding joy in play. She had been in a toy store and ended up having a great time with one of the employees as they played with some of the toys there. She talked about how energized and joyful she felt afterwards. Apparently that sparked something within me, because I continued thinking about the subject after the party was over.

I realized that it was silly and fruitless as well as self-pitying to think that maybe "someday" I could be an artist. The only reasons to stay locked into a helpless state of waiting for something undefined to happen are fear and laziness. I'm an artist right now! I've never made any money from what I do. I've never had my work featured in an exhibit or publication. That doesn't make me any less an artist.

Thinking these things, I felt motivated to get into my paints and make art happen. I've had the idea for a while to create some pieces based on phrases that have meaning to me. Here is one of the happy results of that inspiration. I've taken this piece to work so that I can enjoy it and be reminded of what it means.

I'm staking a claim to the title of artist!

Immi

Sunday, June 5, 2011

The Long Road to Creative Freedom

I've got two art areas in my home. One is in a spare bedroom upstairs. It includes scrapbooking and stamping supplies, along with files of ephemera. My laptop and a sewing machine live in here as well. In order for it to function occasionally as a sleeping space, there is also a futon (sigh). Most of the time the futon is covered with piles of stuff - empty flat space is very dangerous for me! My other art space is down in the laundry room. This is where I do messy work like painting and embossing.

Both spaces have gotten totally out of hand. I've got way too much stuff, and it's reached the point that I have no creative energy because of the mess.  AND, (true confession time), this state exists after multiple attempts to purge. I tend to be a bit of a hoarder, so it's very hard for me to get rid of anything I MIGHT NEED someday. I also tend to buy things on impulse, so I've got supplies I've never used. But something's got to give. I've decided to try having the mindset that I'm moving across the country. I need to evaluate my stash by asking myself if I really want to pack, haul, and unpack it. The weight of it all is like a ball and chain, and I want some freedom to feel light and unfettered! 

So, my Memorial Weekend project has been to make a start at tackling the area in the laundry room. I forgot to take a before picture of this, but I had about a foot square area to work in because of all the things piled up on my work surface. I started with the cabinets above my work table (the table my husband thought would make a good surface for folding laundry - HA!). I had serving pieces up there that I haven't used in years. I'd lugged them all the way from MN to TX in a move several years ago, and then back to MN again. Sheesh. Ahem. In the interests of honesty, I must add that many of my art supplies have made that same journey. You see my dilemma!

The weekend is about over, and although I'm not done, I've made some good progress. I've set aside things that can be donated, and made myself some room to work. I also did a little labeling of supply drawers, which always makes me happy. My "messy studio" is now much more conducive to work. I now feel more energized to tackle the other area, AND I feel more ready to open up to creativity again!

Immi

Wednesday, May 25, 2011

Thrift Store Therapy

Last night I woke up in the early morning hours with a big, fat headache. I knew if I still had it by the time the alarm went off, that it would be with me for the day. I've learned over the years that even though the headache is bearable, there are other symptoms that make it wise for me to stay at home. So...no work for me today.

Usually by late morning or early afternoon, the worst of the yuckiness is over. I thought some light activity might do me some good, so I indulged myself by visiting a couple of thrift stores. You know the thrill of the hunt, right? Many times I come away empty handed, but occasionally I find something I really "need".

My find today was this small oil painting. It's hardly worthy of Sotheby's, but I was drawn to the colors. I've learned to trust my instincts when it comes to buying art. If it calls to me initially, I'll walk away to think about it. If I find myself irresistibly drawn back (and if it's within my $$ range!!), I go for it. At $5, this was definitely within my range, so the choice was an easy one.

When I got home, I started looking right away for a home for this little lovely. For now, it's hanging over the fireplace. It's really too small for that spot, but I love the shot of color it adds to that end of the room.

I count this as a definite pearl placed in my path, and I'm thankful for it!