Thursday, December 5, 2013

Muslin Wreath

Completed Muslin Wreath


Over the recent Thanksgiving weekend, my daughter, daughter-in-law and I gathered supplies for wreath making. While my daughter-in-law chose one type of wreath, my daughter and I decided to make muslin wreaths based on something we'd seen on Pinterest. (Where did we get ideas before Pinterest??) After a trip to Hobby Lobby, we had our supplies (I had plenty of muslin at home).

This involved copious amounts of torn muslin strips tied onto a wire wreath form. The wire forms had an inner and outer ring, and for full coverage the strips needed to be packed in as tightly as possible. Our dining room floor quickly became littered with threads as the sounds of ripping resounded. I don't know why we didn't think to do this in front of the tv while watching a Christmas movie! It took the better part of two afternoons to get all that fabric tied on, and at times we despaired that it would ever look good. We hung in there, though, and were rewarded with our results.

The original pin from Pinterest we used for inspiration had small rolled fabric roses attached to the wreath, but I had in mind a burlap poinsettia. I looked online at photos and video tutorials, and came up with a modified version of my own. I freehand drew a couple of leaf shapes, one larger than the other, and cut several pieces of both sizes from burlap. After all the cutting was done (boy, is burlap messy!), I coated the top sides of each leaf with Liquitex Iridescent Medium using a sponge brush. This is one of my favorite products, as it imparts a beautiful gleam when brushed on. As an acrylic medium, it can also be combined with paint to create shimmering colors. To protect my work surface, I used a non-stick craft sheet which cleans up nicely.

While the leaves were still damp, I made a crease down the center of each to give them some shape. I also cut a small circle from burlap for the center of the flower; this I glued to a couple of layers of paper to give it some body. When everything was dry, I arranged the pieces to try the effect, and used a hot glue gun to put it all together. I ended up with a flower that had three layers; the larger leaves formed the bottom layer and the smaller leaves became the top two layers. Then I used Ranger's Ice Stickles in Silver, Gold and Crystal Ice to edge each leaf, applying one color per layer of flower. I poked a hole in my flower center to accommodate  a jeweled button I'd picked up on our shopping trip. If I'd thought it through (not my strong suit), I would have threaded wire through the button shank to attach everything to the wreath. Since I didn't think of that in time, I had to figure that out later.

After the poinsettia was finished, I hot glued a couple of white berry picks (Hobby Lobby again) to the back as well as a couple of glittered snowflakes I got at Walmart. I cut a square of heavy cotton batting to glue to the back to hold the wire in place, and attached the whole thing to the wreath. The last detail was to make a wire hanger for the top. It's hanging over the fireplace now, and I really like the way it looks against the brick. Here's a close-up of the poinsettia.


Happy crafting!

Immi

Thursday, November 14, 2013

Coming Together

This is a case of multiple story threads all coming together, which is a concept I think is so interesting. Tapestries are a great example of how individual threads make something wonderful when woven together properly.

The first thread is Pinterest. I have had so much fun with Pinterest! I'm sure I'm not the only one who has pinned way more things than could ever be tried. Some of those ideas, though, just need to percolate for a while before their time has come. Quite a while ago, I pinned an idea for making two throw pillows out of one king-sized bed pillow. The reason to do it this way is that it would be much less expensive than buying two throw pillow forms at the craft store.

The second thread is the furnishing of my studio. I've been working for months now, searching thrift and antique stores for bargains. I recently bought myself a secondhand rocking chair for the corner of the room I'd reserved for a sitting area. I thought I'd enjoy having a spot to sit and look through my magazines and art books. We set things up so that I would be able to have a TV within view as well. After sitting in it for a while the other day, though, I realized  that it would be much more comfortable with a cushion behind my back. I figured I'd keep my eye open for fabric and make myself a pillow.

The third thread is that the king sized pillows in the shams on our bed have needed to be replaced for a while, but I haven't been annoyed by them enough to get around to it.

The fourth thread is a trip to Hobby Lobby which would be connected to the studio furnishing thread. (Are you confused yet?) I went there thinking I wanted to recover my bulletin board (in the end I decided not to). I noticed some fabric on clearance that I really liked, but I couldn't think of anything to do with it, so I passed it up and headed home. I actually did not buy anything at HL that day - can you believe it?

I kept thinking about that fabric, wanting to come up with something to do with it, and now the threads begin to come together.

It finally dawned on me that I could take one of those old pillows on the bed to experiment with. This was a chance to do something that I'd pinned AND it gave me a legitimate reason to go back and buy some of  that fabric! YES! I also bought replacement pillows for the bed, so I've got plenty of material for some additional pillows.

It turned out to be fairly easy. There was no problem cutting the pillow in half. It was a little difficult to sew the cut edge closed, but once I got past that it was smooth sailing. In no time I had the new cover cut and sewn, and it looks so nice sitting in my chair. The pattern is fun and bright, with colors that work well in here.

Thanks, Pinterest!

Finished Pillow

Pillow Form

Reading Nook
P.S. Thanks, Mom for talking me into buying that lamp!

Immi


Thursday, October 24, 2013

The Evolution of a Project

Sometimes I find that my projects seem to take on a life of their own while I follow along after them. That was the case with a small cupboard I recently bought. I've been doing my best to get a studio set up in our new home, trying to have what I want while spending the least amount of money possible. That's a tall order! To make it work, I've scoured thrift stores and Craigslist as well as using what I already own.

One of my storage needs was for stamp sets. I still have quite a few of these from the days when I was a Stampin Up! demonstrator. These are wooden stamps designed to coordinate, and each set comes in a plastic storage box. I wanted something with shelves, but I didn't want the shelves to be too tall or deep (hope that makes sense) so that I didn't end up either with things I couldn't see at the back or teetering towers of stamp boxes. I looked and looked, and was getting very discouraged!

At the end of a Friday afternoon after looking all day, I decided to stop at one more place. I found this little cupboard in a vintage shop, which looked to be about the right size. I think it probably was made originally to be used in a kitchen for extra storage. It wasn't very well made, and the materials used were very cheap,  but I like the shape and size. I hesitated though, because it had a strong and unpleasant odor inside. I decided to take a chance, hoping that a good scrubbing would take care of the smell.

Long story short, scrubbing did not work. My DH reminded me that we had a can of Kilz left over from another project. I sprayed the inside well, and it worked like a charm. No more recoiling every time the door was opened! I can tell you, I was relieved.

I wish I had taken a before picture for you. It had been painted a pale mint green - not my kind of color at all. I had a sample of gray we'd tried and rejected for the walls, but I thought it would be just the thing to cover up the previous color. I painted it inside and out, and DH reinforced the hinges for me. I took it upstairs, filled it with stamps, and thought I was finished. Yay! Check another project off the list! But...

While strolling through Hobby Lobby, I spied a stencil for a curling vine with leaves. Hmm...that might look nice on the cupboard door. Well, if I'm going to do that, I might as well reactivate an idea I'd had earlier to paint a section at the top a contrasting color. And if I'm going to do all that, I really should do what ought to have been done in the first place, which is to sand down a lot of old paint drips or what's the point? So, I emptied the cupboard and hauled it outside, spending an afternoon sanding and repainting. Why oh why didn't I do that in the first place!!

Then out of the blue, or from some strange place in my mind, I thought that rather than go just with the vine, it would look nice (at least in my mind's eye) over a neutral geometric background. Not, you understand, that such a coherent thought actually occurred to me - it was more of a mental picture that I'm now trying to describe. I had a picture of a diamond motif in pale white. Thinking that the worst that could happen was that I'd have to paint the whole thing over, I went to work with some low-tack tape. I eyeballed the design (there's no way that I'd have the patience to measure all that!), got some white acrylic paint and had at it. It went very quickly, and as I used a very light touch with the paint it dried quickly. I pulled the tape off and was quite pleased. I almost left it at that, but wanted to go ahead with the vine.

I taped the stencil in place, and used a thick bodied acrylic paint in a really pretty blue. I found that any mistakes were easily wiped off with a wet wipe (you know, the kind parents use on babies - very useful in crafting). The stencil had little dot flowers at the ends of some parts of the vine, but I didn't paint those in. Instead, I pulled out my stash of buttons, and glued buttons on in place of flowers. I'm very happy with the way it turned out, and here it is:
As you can see, the top shelf is a good indication of how poorly this thing was made in the first place! I did try painting the knob in the same blue as the section at the top, but it looked terrible after adding the vine. So back to gray it went. Now I really think I'm finally done! 

Happy crafting,
Immi

Monday, September 9, 2013

Feathering My Nest

Today I want to show you something I made that I think combines form and function. Because of the way my kitchen is configured, I either have to have my mixer out on the counter or on the floor of the pantry. Since it's a full-size Kitchenaid, I didn't want to be lifting it from the floor every time I wanted to use it. That would be a cleaner look for the kitchen, but Oh! my aching back!

Rather than have it sitting there collecting dust between uses, I decided to make a cover for it. Of course I went about it the hard way. There probably is a pattern out there somewhere for a mixer of this size, but I was sure I could figure it out on my own. After all, I can measure, can't I? So what's the big deal?

I did manage to get it done, but not without a lot of basting, ripping, and trimming to get the kind of fit I wanted. I was going for a streamlined look, without unnecessary bagginess if that makes sense. I found some fabric that had a nice punch of color, and a solid for piping (yes, in my mind's eye there was piping, so of course nothing else would do!). I also wanted it to have some body, so I bought some fusible fleece to stiffen it.

I started by making a rough paper pattern, and doing a mock-up with muslin. After the above mentioned basting and ripping, I finally had a muslin pattern to work from. (I used the muslin pieces to line it.) Here's  my finished project:

Front View

Side View

I like the happy colors, and now I don't have to add dusting the mixer to my list of chores!

Now go out there and feather your own nest!

Immi

Thursday, August 29, 2013

Feathering My Nest

We are very happy to have replaced the old, nasty refrigerator that came with our house. Because of space limitations, I did not have a lot of options when considering the new purchase. I did want stainless steel, so we ended up with only one option that would fit our space. Even though we'd  measured the space carefully, and made our choice based on the published dimensions of the refrigerator, it was still too tall for the space. (Our measurements weren't off, the dimensions given were not right.) Aargh! We're going to have to hire someone to come in and do some carpentry work to make things fit. So, in the meantime, we'll live with a refrigerator that sticks out too far into the room. But that's really another story. I'm not actually writing about that at all today!

Today's post is related, though. I promise. Here's how: now that we have a stainless steel model, I no longer have any magnetic surface to use. For years I've kept a magnetic shopping list as well as a container for pens on the front of the fridge. Not to mention random magnets holding up coupons, etc. I know it's not a very sleek look, but it worked. Now I have no shortage of sleekness, but where in the world am I going to keep those things I use daily??

What I do have is a pantry door that has a panel on the inside that was going to waste. I'd read about people making their own magnet boards, so I thought I'd give it a try. I did some research and found that galvanized metal is magnetic. So off I go to the hardware store with a magnet in my purse to test it out. I went to one of the big box stores, where the employees don't always have the level of knowledge that helps ignorant customers like me. I got plenty of blank looks, and was sent all over the store, finally being led to a spot where thin sheets of metal were located. I pulled out my handy dandy magnet, and it worked! I found a piece that was the perfect width, and long enough to hold my list and pen caddy. Here it is:


I'd already decided I wanted a bright yellow, so I bought this:


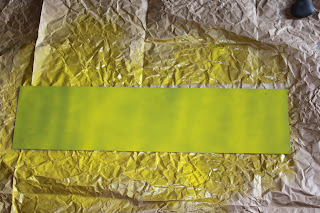
I spread some paper on the garage floor and got to work. It took MANY, MANY, MANY coats to cover the gray and get that bright yellow I wanted.


Unfortunately, I got some overspray on the garage floor, but I didn't let that worry me. It's only the garage floor, right honey? I let it sit for a couple of days, then brought it into the house. I wanted to finish the edges in some way, so I thought washi tape would be the answer. I LOVE working with washi tape! It comes in so many colors and designs, and is so flexible and easy. I found some blue chevron tape in my studio, which seemed exactly right to me. Here's how it turned out:


I like seeing that punchy yellow every time I open the pantry door! I'm pleased with the end result, although I have noticed to my dismay that the magnets are sticking to the painted surface. If I try to take them off, the paint is going to be damaged. Bummer! I don't know if it's a problem with my technique or if a different brand of paint would have performed differently. At any rate, now it's so convenient to keep my grocery list going or grab a pen to put something on the calendar.

Till next time,
Immi


Wednesday, August 21, 2013

Feathering My Nest

Hello! I can't believe it's been so long since I last posted, but I'm ready to start getting back into it. Having recently moved, I'm still hard at work thinking and imagining how to make this new home reflect our tastes without breaking the bank. I've been having some fun with small projects to accomplish that goal, so as I complete things I'll share them with you.

First up is a project that I like to think justifies a habit that doesn't make any sense to my DH (dear husband). Now he doesn't go to a store unless he has a specific goal in mind; I love to browse and see what catches my eye. Many months back, before we knew we were moving, I had picked up a rub-on wall decal meant for the kitchen. It was on clearance, so I didn't feel bad about spending a few bucks on it even though I wasn't exactly sure where I wanted to use it (another thing that DH doesn't understand!). When I got it home, I found a place that it would work, but for some reason I never got around to using it. So, of course, I packed it up and moved it across the country with me!

My new house has lots of cupboards, but almost zero blank wall space. Great storage, but little room to decorate. So the package with the decal sat on the counter for a while, taunting me to find a space and use it. Looking around one day, I noticed that I had one upper cabinet that I thought had enough space on the door for the decal. A quick measure confirmed that it would fit. I should mention that the cabinets are all painted a glossy off-white, so the decal which is wood-toned, would show up well.

Here's the before picture:


I pulled out the decal, and read the directions carefully. The box came with the decal cut into strips and an applicator for adhering  it. After washing the cabinet door and drying it, I taped the sections to the door, and started slowly rubbing it on. It was a little tricky to work with, as  once the liner is removed, you really can't reposition it if you don't like the placement. I ended up with some bubbles that I tried to remove, not altogether successfully.

Here's the after photo:


If I look closely, I can see the imperfections, but all in all, I'm quite pleased with the way  it turned  out. It was inexpensive and fairly quick and easy - all good things! If I ever get tired of it, a hair dryer will loosen the adhesive and  it should come off cleanly (at least that's what the package promises!).

I do love feathering my nest!
Immi

Tuesday, March 12, 2013

Volunteers Rock!


I work for an adult basic education program, and volunteers are very important to our work. We have volunteers who work directly with students one-on-one or in groups; we also have a special volunteer who does all kinds of mundane clerical tasks. Every year, those in charge of our volunteer program organize an event to thank the volunteers for all they do. A special day is planned, and the staff works very hard to come up with a theme, decorate, and find/buy inexpensive gifts.

For this year's theme, we had to incorporate butterflies. They've been a symbol for us this year, as we've gone through a major change. After 50+ years, it was time for a name change and a new logo. I enjoyed being a part of the committee that worked on choosing the logo and new colors. The timing was perfect, as we wanted to celebrate the remarkable ways our program has improved. Just a few short years ago, we were at the bottom of the state "report card" for programs of our size (we're the fourth largest in the state). Thanks to the gifted leadership of a new director, lots of hard work from clerical staff and teachers, and plenty of innovative thinking, we've moved to the very top. That's an incredible turnaround, and we are quite proud! (I think it's so funny that the only area we missed being #1 is in the area of student retention. State Corrections beat us on that one!)

Anyway, I was asked for advice about a way to incorporate butterflies into this year's gift. The volunteer coordinator had scoured the internet and Pinterest, looking for interesting ideas, and she showed those to me. I was especially drawn to a couple of examples that used collage. We talked about trying to mass produce something original for each person, but that was overwhelming. Then we had the idea to have one original "something" which could be reproduced via color copier as a card. I timidly volunteered to take a stab at creating a piece of art, and she took me up on it. Yikes! I get myself into all kinds of pickles this way! I was nervous, but excited to get started.

The inspiration was a poem she had chosen that would be printed inside the cards. I won't include it here since I don't know the author, but it's about the migration of monarch butterflies and their difficult journey. Two important words in the poem are "believe" and "achieve".

I decided to use a quality piece of watercolor paper for this, and began as I love to do by creating a messy background. I used paint, gesso & spray ink, and included a few pieces of cheesecloth for texture. The butterfly I drew the way I learned  in grade school: fold a piece of paper in half, draw & open. Easy peasy. I traced the shape onto another piece of watercolor paper which I cut out. I pulled out an assortment of papers and created a collage, adding some ink & paint over that. The words in the center are too small to see here, but they are words that came to my mind when I thought of volunteering. I cut them out of an old dictionary and glued them down.

Once the butterfly was finished, I glued it to the background. I made antennae out of some copper wire I had, running it through a paper crimper for texture. I stamped the words believe & achieve, and added a few fun touches. Voila! All done!

I'm going to be excited to see this up when it's time for display, and I'm happy to have had an opportunity to do something I love to make a positive contribution at work.

Till next time,
Immi