Showing posts with label Penny Black. Show all posts

Monday, July 27, 2015

Challenge: No Ordinary Paper

The Monday challenge this week on Simon Says Stamp is to use some type of paper other than regular cardstock. There are several wonderful examples of work to provide some inspiration.

I've been experimenting lately with Bristol. I bought a pad on sale and have tried some stamping techniques on it. It is very smooth, has a nice weight, and takes ink quite well (much better than some of the cheaper cardstock I've tried). Here is one of the cards I did:


I started with a piece of Bristol, cut to 4.25" x 5.5". I blended Antique Linen Distress ink over the surface with a blending tool. Next, I stamped the tree (Xmas Constellation by Penny Black) with Doll Pink ink from Simon Says Stamp. The sentiment is from Winter Wonderland from Winnie & Walter; it is stamped with Potting Soil Archival ink and heat embossed with clear embossing powder.

The splotches on the card front are made by mixing Broken China Distress ink, water, and a little Perfect Pearls pigment powder. This mixture is picked up with a small brush and flicked over the card front. I also did a little mixture of water and Perfect Pearls with no additional color and flicked that over the surface as well. Hopefully it gives the suggestion of snow, but maybe it just looks messy!!

I trimmed the Bristol panel down slightly and mounted it to a dark brown card base. The two thin colored strips on the right were made by rubbing ink directly from the ink pad onto the surface of some scrap Bristol - I used Broken China & Doll Pink. Once the ink had dried, I cut the strips and glued them down. Since the blue strip was slightly raised due to being layered over the Bristol, I cut two tiny pieces of cardstock to glue underneath the ends to keep everything even.

I hope your week is off to a good start!

Immi


Monday, February 16, 2015

Thanks!

Today I'm enjoying a day off from work. I recently started a new job, and I'm missing my craft time! I decided to make a "thank you" card today for a co-worker of mine. She made a little sign with my name for my work space as a welcoming gesture - so nice of her! I thought it would be fun to use the Simon Says Stamp Monday challenge, A Piece of Paradise, to jump start my project.


I started with a piece of watercolor paper, cut to A2 size. I sprayed it with water, then had fun with several spray inks (Glimmer Mist & October Afternoon), letting the colors run and blend together. After drying it with my heat gun, I took a Tim Holtz stencil (Burlap), and spread Ranger's Texture Paste randomly through the stencil. I let that air dry for a little bit, then finished the drying with the heat tool. I used some Mini Distress inks and blending tools to add some color to the top of the texture paste. Next I die cut watercolor paper into flowers & leaves using Tattered Florals and Tattered Leaves dies from Sizzix. I sprayed those with inks as well, but they seemed a little blah. I added some interest to them by using various stencils & stamps. For the leaves, I used the Typewriter Background stamp from My Favorite Things and Mowed Lawn Distress Ink. For the purple flower layer, I used Tim Holtz' stencil, Dot Fade and Seedless Preserves Distress Ink. For the yellow flower layer, I stamped with Dandelion Archival Ink and a Penny Black stamp called Penmanship. The blue flower layer is stamped with Peacock Feathers Distress Ink and a mini script stamp from Prima. I also edged the leaves with a Black Soot Distress Marker to help them stand out more from the background. I glued the leaves & flower down with Perfect Paper adhesive. The sentiment is from Stampin' Up! (Many Thanks). That was stamped on a scrap of watercolor paper with Versafine Black Onyx, covered with clear embossing powder, and heated. I trimmed closely around it and sprayed it with Sea Glass Glimmer Mist. Then I mounted it on a scrap of purple cardstock, notched on the one edge. I tucked the opposite edge under the leaves when I glued it down. The finished panel was mounted on purple cardstock, using Tombow's Extreme Adhesive. For one last touch, I glued a clear gemstone from my stash as a center for the flower.

That's it for today - happy Monday to you all!

Immi


Monday, November 24, 2014

Christmas Tag Card

Although I usually don't make my own Christmas cards, it's easy to find inspiration this time of year. I have some new stamps that I won in a drawing (Winter Wonderland by Winnie & Walter) and wanted to try them out:


I started with a plain manila tag, colored with Broken China distress ink and a blending tool. I inked the tree stamp with Peeled Paint Distress Ink and spritzed it lightly with water before stamping over my blue background. After heat setting, I mixed up a little white acrylic paint with water and flicked it over the tag with a paintbrush to create a snowy effect. 

The stag was stamped with Ranger's Potting Soil Archival Ink and coated with clear embossing powder while wet. After heat setting, I poured on additional embossing powder and heat set it again for a nice, smooth look.

I wanted to layer some papers behind the tag, so I chose a red plaid and cut it into a tag shape. The white paper with green dots is a Project Life journal tag which came printed with grid lines. I stamped the dots using Penny Black's Dots in Space stamp and Peeled Paint ink, then cut it into a tag shape. After punching holes in my homemade tags, I tied them behind my stamped tag using some dark red sheer ribbon.

The white panel behind the tags started as plain white cardstock. I used Ranger's Texture Paste through a Prima chevron stencil, then sprinkled some iridescent embossing powder over that. I let it sit for a few minutes and then heat set it.

The sentiment is inked with Potting Soil and embossed with clear powder. I colored the white cardstock with Aged Mahogany Distress Ink and a blending tool, and cut the banner shape by hand.

Everything was adhered to a dark brown cardstock base, cut to be a top folding card.

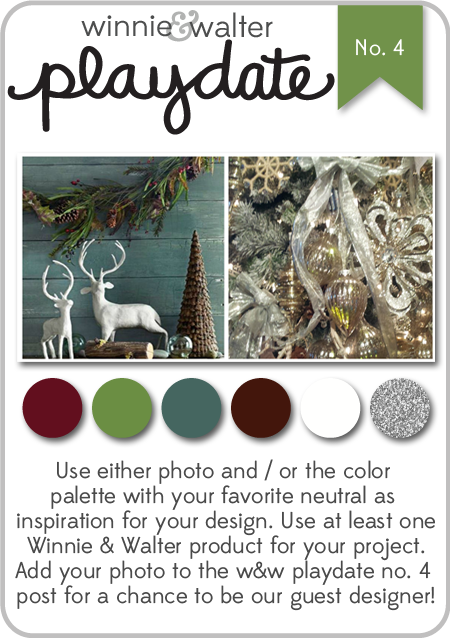
I'm linking this card up to two challenges: Winnie & Walter Playdate #4 and Muse Challenge #95. I pulled inspiration from both of these challenges to make my card. My colors I chose from the Winnie & Walter image:

w&w_playdate4_oct2014
Winnie & Walter Playdate #4

The idea of layered tags came from the Muse image:

Muse Challenge #95

I hope you have a great time this week, enjoying Thanksgiving with family and friends!

Immi