Showing posts with label Prima. Show all posts

Monday, February 16, 2015

Thanks!

Today I'm enjoying a day off from work. I recently started a new job, and I'm missing my craft time! I decided to make a "thank you" card today for a co-worker of mine. She made a little sign with my name for my work space as a welcoming gesture - so nice of her! I thought it would be fun to use the Simon Says Stamp Monday challenge, A Piece of Paradise, to jump start my project.


I started with a piece of watercolor paper, cut to A2 size. I sprayed it with water, then had fun with several spray inks (Glimmer Mist & October Afternoon), letting the colors run and blend together. After drying it with my heat gun, I took a Tim Holtz stencil (Burlap), and spread Ranger's Texture Paste randomly through the stencil. I let that air dry for a little bit, then finished the drying with the heat tool. I used some Mini Distress inks and blending tools to add some color to the top of the texture paste. Next I die cut watercolor paper into flowers & leaves using Tattered Florals and Tattered Leaves dies from Sizzix. I sprayed those with inks as well, but they seemed a little blah. I added some interest to them by using various stencils & stamps. For the leaves, I used the Typewriter Background stamp from My Favorite Things and Mowed Lawn Distress Ink. For the purple flower layer, I used Tim Holtz' stencil, Dot Fade and Seedless Preserves Distress Ink. For the yellow flower layer, I stamped with Dandelion Archival Ink and a Penny Black stamp called Penmanship. The blue flower layer is stamped with Peacock Feathers Distress Ink and a mini script stamp from Prima. I also edged the leaves with a Black Soot Distress Marker to help them stand out more from the background. I glued the leaves & flower down with Perfect Paper adhesive. The sentiment is from Stampin' Up! (Many Thanks). That was stamped on a scrap of watercolor paper with Versafine Black Onyx, covered with clear embossing powder, and heated. I trimmed closely around it and sprayed it with Sea Glass Glimmer Mist. Then I mounted it on a scrap of purple cardstock, notched on the one edge. I tucked the opposite edge under the leaves when I glued it down. The finished panel was mounted on purple cardstock, using Tombow's Extreme Adhesive. For one last touch, I glued a clear gemstone from my stash as a center for the flower.

That's it for today - happy Monday to you all!

Immi


Monday, November 24, 2014

Christmas Tag Card

Although I usually don't make my own Christmas cards, it's easy to find inspiration this time of year. I have some new stamps that I won in a drawing (Winter Wonderland by Winnie & Walter) and wanted to try them out:


I started with a plain manila tag, colored with Broken China distress ink and a blending tool. I inked the tree stamp with Peeled Paint Distress Ink and spritzed it lightly with water before stamping over my blue background. After heat setting, I mixed up a little white acrylic paint with water and flicked it over the tag with a paintbrush to create a snowy effect. 

The stag was stamped with Ranger's Potting Soil Archival Ink and coated with clear embossing powder while wet. After heat setting, I poured on additional embossing powder and heat set it again for a nice, smooth look.

I wanted to layer some papers behind the tag, so I chose a red plaid and cut it into a tag shape. The white paper with green dots is a Project Life journal tag which came printed with grid lines. I stamped the dots using Penny Black's Dots in Space stamp and Peeled Paint ink, then cut it into a tag shape. After punching holes in my homemade tags, I tied them behind my stamped tag using some dark red sheer ribbon.

The white panel behind the tags started as plain white cardstock. I used Ranger's Texture Paste through a Prima chevron stencil, then sprinkled some iridescent embossing powder over that. I let it sit for a few minutes and then heat set it.

The sentiment is inked with Potting Soil and embossed with clear powder. I colored the white cardstock with Aged Mahogany Distress Ink and a blending tool, and cut the banner shape by hand.

Everything was adhered to a dark brown cardstock base, cut to be a top folding card.

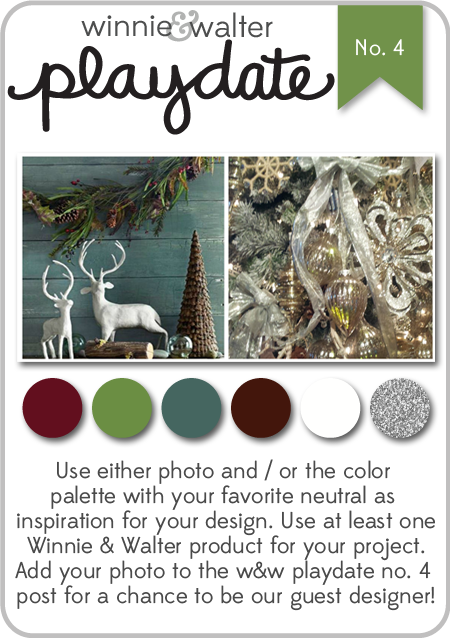
I'm linking this card up to two challenges: Winnie & Walter Playdate #4 and Muse Challenge #95. I pulled inspiration from both of these challenges to make my card. My colors I chose from the Winnie & Walter image:

w&w_playdate4_oct2014
Winnie & Walter Playdate #4

The idea of layered tags came from the Muse image:

Muse Challenge #95

I hope you have a great time this week, enjoying Thanksgiving with family and friends!

Immi