Showing posts with label Distress Ink. Show all posts

Thursday, April 28, 2016

Faux Print Look

One of the things I enjoy doing is checking the blogs of artists whose work I admire. I appreciate their creativity, and learn from their generous sharing of knowledge.

I recently saw a blog post from a paper artist in Europe. Her style is so bright and fun, and she often uses paint to create the backgrounds for her stamped cards. I was intrigued by a card she posted recently, and she included a link to the artist's video that demonstrated the technique she used, called the faux print look.

Here is a link to her blog post: http://somefiddlingonthekitchentable.blogspot.com/2016/04/faux-print-look.html. And here is the link to the video tutorial she referenced: http://www.kimdellow.co.uk/2016/04/video-get-faux-printed-look.html.

I was impressed with how easy she made it look, and couldn't wait to give it a try. I got out the very simple supplies needed: cardstock, acrylic paint (the cheap craft paint works fine), and an old plastic gift card.

Following her directions, I spread thin layers of paint across the surface of the cardstock, leaving a white border around the edges. Because the paint is so thin, it dries very quickly. It is so easy to make several backgrounds at once and have some on hand.


I love the way it turned out! I wanted to use it in a card to submit for a Facebook challenge with the Unity Show & Tell group. This particular challenge was to use one of the "Unity Girl" stamps - there are so many, but I only have a few. I thought this particular one (Maple Girl) would look nice against the painted background. I stamped it with Ranger Archival ink - since the face is tilted slightly towards the right, I placed the image to the left of my painted panel. 

I also used a Unity text stamp (Vintage Handwritten) in the background, around the main image - to keep it light, I stamped off on scrap paper before stamping on the panel. The sentiment is from a recent kit called "Sometimes I Wonder". I stamped that on a scrap of white cardstock, and blended Distress Peacock Feathers ink over it to get that shade of blue. I trimmed it down with some old decorative scissors from Stampin' Up!, and stitched it down to the main panel. 

After trimming, the stamped panel seemed a little short, so I got some scrap lace trim out to fill up that extra space at the bottom. I figured that the sewing machine was the best way to attach it, so I used deliberately messy stitching and  black thread to sew it down and create a frame around the card at the same time. I glued it down to some mustard colored cardstock, and left it under a book overnight to dry completely.

After posting it in the Facebook group, I received several nice comments, so I thought I'd put it out here for everyone. I appreciate that others shared what they did so that I could learn and benefit from it!

Hope your week is going well - I know I'm looking forward to the weekend!

Immi

Monday, September 14, 2015

Postage Background

I pulled out some oldie but goodie stamps for today's card. I love the look of old postage, and have several stamps that look like postage stamps. I haven't used them in a while, and decided to make a background with them.


I started with a piece of white Bristol, cut to 4.25" x 5.5". I wanted to use muted colors so that none of the individual stamps would stand out, but blend together. I used some dye inks from Stampin' Up! that I've had since I first began stamping - Almost Amethyst, Barely Banana, Close to Cocoa, and Mellow Moss. I also used an ink Stampin' Up! produced together with Ancient Page called Pretty in Pink. The stamps I used are: French Postage by Paper Inspirations, French Post by Hampton Art, and Creative Block #13 by Stamper's Anonymous. I also used a stamp that is part of a set designed by Dawn Houser for Inkadinkado called World Traveler & Postage Mark as well as a stamp from a set by Stampin' Up! (the cancellation mark). 

Each stamp is stamped multiple times, allowing the images to overlap. I decided that the white of the background was a bit too stark, so I used Distress Antique Linen ink and a blending tool to tone everything down a little.

The sentiment is a new-to-me die from Savvy Dies called Hello Script. I cut it four times from some scrap brown cardstock and glued all the layers together to make it stand up a little from the surface of the card. After gluing it down with matte medium, I decided to add a few sequins from Doodlebug Design. They are also glued down with matte medium. I trimmed the panel slightly smaller and mounted it on a dark brown cardstock base.


Till next time - 

Immi

Friday, September 11, 2015

Thank You Card

It's always good to have some thank you cards on hand - I already know who is going to get this one. This is the last of three cards I made inspired by the current Unity Stamp challenge. To see the other posts, click here and here.

Now on to today's card:


I used a couple of sets from Unity for this card - Donna Poppies and Butterflies & Sunbeams. I wanted to do a resist technique for this card, so I stamped the poppy with Versamark ink on a manila shipping tag, allowing the image to hang off the edge. (I think it adds some interest that way.) Versamark is a clear, sticky ink that is wonderful for heat embossing. I poured clear embossing powder over the image and set it with a heat tool. I chose a couple of colors of Distress Inks - Bundled Sage & Rusty Hinge, using blending tools to cover the surface of the tag. The area that was stamped & embossed resists the color, allowing the base color of the tag to show through - pretty cool!

Next I dabbed some Distress Stain in Peeled Paint on my craft sheet and pressed the surface of the tag into the wet color. This creates the darker areas of green. I really like the uneven, splotchy look I got. Once it was dry, I got out an iron I keep just for craft techniques and ironed the back of the tag with scratch paper under the front. The scratch paper soaks up the embossing powder as the iron melts it. This leaves the original tag color showing, but the surface is smooth rather than raised as it would be if I left the embossing alone. It almost looks like batik, and I guess it's the same principle. The sentiment was stamped with Making Memories Artprint Brown and embossed with clear powder.

I used two colors of twine that coordinated with my palette to tie a bow through the hole in the top of the tag. The papers underneath all got some Distress Ink treatment to darken the edges, and everything is mounted on a cream colored card base.

Here is the challenge image from the Unity blog:


I enjoyed this challenge a lot, and had fun working with these colors.

Hope your week is going well,

Immi

Sunday, September 6, 2015

Fall is in the Air

This is the time of year when I wish I still lived in Minnesota. Fall was my favorite time of year there! Relief from the heat and humidity of summer, the pleasure of pulling out favorite sweaters to wear, stunning fall colors as the leaves turned, and of course, the Minnesota State Fair!

I was inspired when I saw the current challenge on the Unity Stamp blog - the colors are perfect for fall themes.

I enjoyed pulling out some stamps and playing around with inks and paper to come up with something that fit the challenge. I plan to share a few cards spread out over multiple blog posts that I will be linking to the challenge.
First up:


I used a stamp set from Unity called Shrooms. The image and sentiment are both stamped with black Archival ink on watercolor paper, I added color to the mushrooms with a variety of Distress inks and a wet brush. I also added some splatters of wet ink. I figured since these are rather whimsical, the colors don't have to match what you'd find in nature - why not have some fun with it?

I cut the stamped paper into a banner shape and roughed up the edges with a Tim Holtz distresser tool. To add a little additional color, I inked up a blending tool with some Distress ink. Beginning from the outside, I blended color onto the paper, making the edges darker and leaving the center of the panel lighter. 

Now for some fun layering papers. I chose some 6x6 papers from my stash and cut another banner shape slightly larger than my stamped panel from a blue print. I used a little adhesive just in the center to keep the two pieces from shifting, and stitched around the edges using my sewing machine and tan thread.

The rust stripe also got some additional color around the edges with Distress ink and a blending tool, then the stitched banner was adhered to the top. I pulled out some very fine variegated thread and a metal button to dress up the top, taping the thread down on the back side of the panel. I chose a cream cardstock for the card base, creating a side-folding card.

Here is the challenge image so you can see what the original inspiration was.


I hope your week is off to a good start! I'll be back soon with some more cards for this challenge.

Immi

Tuesday, August 11, 2015

Unity Stamp Challenge

The current challenge at Unity Stamps is about to end, so I'm barely going to get this posted in time to participate.

As shown on their blog, here is the starting point. Participants can choose to follow the color scheme or layout as loosely as they like. I thought the color scheme was great, and I liked the card layout as well. I recently purchased the stamp set (Butterflies & Sunbeams) featured in the layout, so I decided to use that.


Here's my interpretation:


I stamped the heart & butterfly image on watercolor paper using Black Archival ink. The coloring was super simple with watered down inks and a paintbrush. The inks I used on the butterflies are Distress Picked Raspberry and Dried Marigold (I combined the two for the largest butterfly.) The heart is a combination of Distress Spun Sugar and Tea Dye. The ink splatters are Picked Raspberry & Dried Marigold.

Once that was dry, I stitched the panel to a piece of black paper with gold script I had in my stash. I didn't do the neatest job the first time around on the stitching, so I went around again, deliberately making it look at little wonky. Now no one can tell where I messed up the first time!

The card base is white cardstock, stamped repeatedly with one of the sentiments from this stamp set, using Creamy Caramel ink from Stampin' Up! Between the black paper and the card base, I layered a piece of pink patterned paper from a 6 x 6 Colorbok pad called Light Bright.

The sentiment at the top was stamped on a scrap of watercolor paper with Versafine Onyx Black and heat embossed with clear embossing powder. I used some of the Picked Raspberry & Dried Marigold to color it, and stitched one end with black thread. I notched the opposite end, and used Distress Black Soot to go around the edge.

I hope your week is going well. I'll be back at work beginning next week - this summer has flown by!

Till next time,

Immi


Monday, July 27, 2015

Challenge: No Ordinary Paper

The Monday challenge this week on Simon Says Stamp is to use some type of paper other than regular cardstock. There are several wonderful examples of work to provide some inspiration.

I've been experimenting lately with Bristol. I bought a pad on sale and have tried some stamping techniques on it. It is very smooth, has a nice weight, and takes ink quite well (much better than some of the cheaper cardstock I've tried). Here is one of the cards I did:


I started with a piece of Bristol, cut to 4.25" x 5.5". I blended Antique Linen Distress ink over the surface with a blending tool. Next, I stamped the tree (Xmas Constellation by Penny Black) with Doll Pink ink from Simon Says Stamp. The sentiment is from Winter Wonderland from Winnie & Walter; it is stamped with Potting Soil Archival ink and heat embossed with clear embossing powder.

The splotches on the card front are made by mixing Broken China Distress ink, water, and a little Perfect Pearls pigment powder. This mixture is picked up with a small brush and flicked over the card front. I also did a little mixture of water and Perfect Pearls with no additional color and flicked that over the surface as well. Hopefully it gives the suggestion of snow, but maybe it just looks messy!!

I trimmed the Bristol panel down slightly and mounted it to a dark brown card base. The two thin colored strips on the right were made by rubbing ink directly from the ink pad onto the surface of some scrap Bristol - I used Broken China & Doll Pink. Once the ink had dried, I cut the strips and glued them down. Since the blue strip was slightly raised due to being layered over the Bristol, I cut two tiny pieces of cardstock to glue underneath the ends to keep everything even.

I hope your week is off to a good start!

Immi


Friday, July 17, 2015

Moleskine Notebook

This month's Make It Take It challenge on the Craft Stamper blog is wide open for interpretation since "Anything Goes"! The only rule is that it must involve stamping. I've decided to submit a little Moleskine notebook I did and keep my fingers crossed that it's a winner.


This was a fun little project. I had previously stamped on the cover of this notebook but wasn't too happy with the result. I decided to try stamping something new on watercolor paper and figure out some way to attach the panel to the cover.

I chose to use some clear stamps from Martha Stewart which I stamped in black Archival ink. I chose this ink since it is permanent and I knew I'd be adding watercolor later. Before doing any watercolor, though, I decided to try sprinkling some masking fluid randomly over the surface so that some spots would stay a nice crisp white.

After the masking fluid dried, I had fun with several colors of Distress ink, rubbed on my craft sheet and diluted with water. I colored the butterflies first. After they were dry, I created the background, allowing colors to bleed together on the wet paper.

When everything was dry, I rubbed the dots of masking fluid off, revealing the white dots. I really like the way it looks. 

Now I had to figure out how to attach it to the cover of the notebook. My experience has taught me that it would be really tough to glue it down so that there was no danger of the edges ever lifting. I decided to try machine stitching to see if I could get through the thick watercolor paper as well as the stiff cover of the notebook. It worked wonderfully, and I really like the way the black stitching looks around the edges. (I used a corner rounder on the two right corners since those corners were also rounded on the notebook.)

Even if this doesn't win this month's contest, I'm still quite happy with the way it turned out!

Till next time,

Immi

Monday, June 8, 2015

Take a Technique: Texture

I made this card a while back, and thought it would be a good fit for the latest Take It Make It challenge from Craft Stamper. The challenge this month is to use texture. This card has rough and smooth texture because of the papers I used.

Here's my card:


I started with a piece of watercolor paper which has a rough side and a smoother side. I chose the rough side. I inked up the Measured stencil by Tim Holtz with several mini Distress ink pads. Then after spritzing the stencil with water, I pressed the inked side down onto the paper and let it absorb for a minute. If you look closely at the lower left corner of the panel, you can see one of the numbers fairly clearly.

Next, with black Archival ink, I used the butterfly stamp from Stamper's Anonymous Papillon and stamped over the (dry) Distress inked background. I layered this panel onto some black cardstock, leaving just a thin edge showing.

Next I chose a patterned vellum (here's my smooth texture) and layered it over orange cardstock. I stitched the two together around the edges (more texture from the stitching). After taping this to the card front, I taped down my watercolored panel.

Finally, I stamped a tiny sentiment (Thanks Script by A Muse ArtStamps) with Versafine black and heat embossed it with clear embossing powder (nice raised texture). I cut a notch in one end of the panel and layered it onto black cardstock, again leaving a thin edge showing. I mounted this to the card front with some foam squares, which give some additional depth and interest.

Hope you enjoyed today's project!

Immi

Saturday, June 6, 2015

Ombre is Hot!

Now that summer "vacay" has started, I'm enjoying more time in my studio again. I'm hoping to participate in some challenges this summer, so I'm starting off with the latest challenge on Virgina's View Challenge blog. The challenge is to include an ombre color scheme or monochromatic color scheme or both.

Ombre is hot, hot, hot right now - and lots of fun, too. Recently, Hero Arts released some ombre ink pads, and I was able to pick up a couple at my local Hobby Lobby. (Of course, I always use a 40% coupon - so nice that I can pull it up on my phone!)

Here's my card:

I started with a 4.5" x 5.25" piece of white cardstock and Hero Arts Canvas background stamp. I inked the stamp with Hero Arts Butter to Orange Ombre Ink Pad, following the advice of Jennifer McGuire to get a good blend. The color change is subtle, but pretty.

Next I cut another piece of white cardstock with the largest tag from Sizzix Alterations Tag Collection Framelits die set. Using an ink blending tool and one of my good old Stampin' Up! ink pads - Barely Banana, I colored the tag. Next I used a new-to-me stamp set (bought on clearance at Hobby Lobby!) - also by Alterations - French Flight. (Although I didn't make use of it on this card, this stamp set comes with the matching dies.) I inked the butterfly stamp with Ripe Persimmon Distress ink, stamped it and heat set it. I used some Spiced Marmalade Distress ink on the very edges of the tag and the canvas stamped panel. I also cut the same tag shape from a scrap of textured orange cardstock.

To assemble everything, I attached the canvas panel to my last piece of Barely Banana cardstock. I layered the two tags and adhered them towards the left side of the card front. I made a double loop bow from some thin American Crafts twine in orange and glued it to the top of the tag with Multi Medium Matte by Ranger. I stamped the greeting from Altenew's Hennah Elements with black Versafine ink on a scrap piece of white cardstock I'd colored with Ripe Persimmon ink. I covered the sentiment with clear embossing powder and heat set it, then using some tiny pieces of foam tape I attached it towards the bottom right. A few Doodlebug & Studio Calico sequins were glued down with the same matte medium.

It sounds like a lot of steps, but really went together fairly quickly. I probably spent more time agonizing over where the sequins should go than I did on anything else! Some card artists make it look so easy, but it's not intuitive for me at all. 

Hope your summer is off to a good start!

Immi


Tuesday, April 7, 2015

All Layered Up


Hello! I'm popping in today with a quick post, linking to a new challenge. Virginia's View has a challenge to use layers or dimension, and this card I made a while ago seemed to fit the bill.

I started with a panel of watercolor paper and a striped background stamp from Stampin' Up! I inked it with Distress Ink, then spritzed the stamp with water before pressing the paper over the stamp. The flower stamp is called Hollyhocks from Prickley Pear. It's stamped with black Archival ink on watercolor paper, and colored with watered down Distress Inks, then torn roughly around the image. I mounted it onto the striped panel, then went to work on the sentiment.

The word "celebrate" is from Altenew's Label Love, stamped in black and trimmed with a small white border. That is mounted onto the striped panel with some foam tape to help it stand out a little bit. Before sticking it down, I made some messy loops with thin gold thread, and used the foam tape to hold it in place. Everything is then mounted onto a navy cardstock base.

I hope your week is going well!

Immi

Saturday, March 21, 2015

Muse Challenge #109

I had some time this morning to play around, so I thought I'd try my hand at the latest Muse Challenge. Here's my take:

Muse Challenge #109

Here's the original challenge image:


I loved the yellow background contrasting with the bright blue, the placement of the stamped image, and the Polaroid-style frame. Such a cheerful card!

I started with a piece of smooth white cardstock and blended Distress Inks in Squeezed Lemonade and Mustard Seed over the surface. Then I misted a little water over that and blotted it off. I also like the darker specks of color in the inspiration card, so I put a little Lemon Zest Dylusions spray on my craft sheet and diluted it with water. Then I picked up the color with a small paintbrush and flicked it over my paper. Since I ended up trimming the paper down quite a bit, all that detail doesn't show up in the finished card, but I enjoyed doing it anyway.

I chose an old stamp from a Stampin' Up! set called Nice & Easy Notes and stamped it in black Archival ink on a scrap of watercolor paper. I used Distress Markers in Spun Sugar, Picked Raspberry, Spiced Marmalade, Mowed Lawn, Broken China, and Stormy Ocean to add color to my stamped image. Then, with a wet brush, I blended the colors and dried everything with a heat tool. I added some splashes of yellow over the top, using the same method described above. I used a square punch and a paper trimmer to create my pink "Polaroid" frame, and glued the watercolored image behind it. Then I mounted that onto my yellow paper and trimmed it down. I pulled out a fun printed paper I had in my scrap bin - I wish you could touch it, as the pink flowers are flocked. That was trimmed a little smaller than the turquoise card base and everything was mounted with a tape adhesive.

I had a  scrap of blue glitter cardstock that I punched with my favorite Martha Stewart butterfly punch. That has to be one of  the best purchases I've made - I've used that same punch so many times, and I never get tired of it! I decided that I wanted the blue flowerpot to match the butterfly and turquoise cardstock a little better, so I used a Stampin' Up! marker in Tempting Turquoise to add some additional color, blending with a wet brush. At first I was wasn't sure about the green color that it created when blended with the Distress Inks I'd used earlier, but I really like the finished result. I think it has more depth and interest than before - glad that one turned out okay!!!

For one final touch, I added some Glossy Accents to the flowers - here's a closeup:

Glossy Accents Closeup
Have a great weekend!

Immi

Thursday, March 19, 2015

Heat Tool Comparison / Hero Arts Nature Challenge

Hero Arts Nature Challenge


Sometimes it's nice to upgrade a tool. I use a heat tool often in my stamping, as I enjoy heat embossing. It's also handy to speed up the drying process when using wet media. For years I've used the Ranger Heat it Craft Tool; it worked well and I didn't think about replacing it. I began seeing another heat tool used fairly often as I watched video tutorials. This one is made by Milwaukee and is the 1400 model. I noticed as I watched others do heat embossing that it seemed to go so much faster than I was used to. I finally decided to take the plunge and get one.

It came in the mail today, so I quickly got it out and decided to see if it was as good as I hoped.

Ranger Heat it Craft Tool

Milwaukee 1400


I had a scrap of an old manila file on my work  surface, and a brand new Hero Arts stamp (Paint a Flower) I'd just scored on clearance. I inked the stamp with Versamark and stamped the image in the center. I coated it with white embossing powder, then stamped and coated the same flower twice more. (Sprinkling the embossing powder on the first image makes it easier to see where to stamp again, since Versamark ink is clear.) I turned on the heat gun and was thrilled at how quickly the embossing powder melted! I also like that the nozzle is much smaller than my other heat gun, which allowed me to keep the heat focused where I wanted it. It is slightly louder than the Ranger tool, but not enough to be a nuisance. I was glad that I had glanced at the instruction booklet before using it, since it smoked a little at first. I knew that was okay, since I'd read that it might do that - just as the booklet said, it quit doing that after a few moments.

I got out some Distress Stains in Spiced Marmalade and Peeled Paint and squeezed the color onto my craft sheet. I dragged the stamped paper through the wet stain, then dried it and repeated the process. The white embossed flowers resisted the stain, and I love the way it looks.


I thought it would look a little more interesting if I cropped the image tightly around the flowers, so I trimmed the panel down and rubbed some Brushed Corduroy Distress Ink around the edges.


I had a scrap of the stained manila file left, so I stamped a greeting from Hero Arts Trees, Birds, & Messages, using Ancient Page Close to Cocoa and clear embossing powder. I layered my stamped pieces with some patterned paper and some textured brown paper and mounted everything on green cardstock.

Finished Card

I'm linking this to the Hero Arts Nature Challenge.

It's the last day of winter, so Happy Spring tomorrow!

Immi


Monday, March 16, 2015

One Thing Leads to Another

I have such a hard time cleaning my studio because One Thing Leads to Another! Today's project is a result.

I have been trying to sort through things and either get rid of or find a use for some of the random "stuff" I've accumulated over the years. One of those things was a result of a craft I'd tried years ago - scherenschnitte. If you've never heard of it, it's an old German paper craft than involves lots of teeny, tiny, detailed fussy cutting. It was all the rage back when rustic country decorating was hot. I bought some paper patterns and tiny scissors, but quickly discovered that I did not enjoy it. I don't have the patience to do something that requires such slow, careful attention to minute details. Because I hate to throw things away, though, I'd hung on to a rooster that I'd cut out (mind you, this was back in the 80's! Do you think I have a problem???)


I pulled it out the other day, determined to throw it out, but I just couldn't do it. It occurred to me that I could use it to decorate one of the gift bags that I sell at a local shop. I call them "junque" bags because "junque" seems better than "junk" and because I use up odds and ends to decorate them. I had a lightweight piece of paper sitting on my work surface that had been sprayed with red ink. I thought it would look nice behind the rooster, but it wasn't quite big enough. I decided that a little red & blue collage would look good with the rooster (which was a plain, cream colored paper).

I tore a page from an old dictionary and rubbed a blue ink pad on it, then added some spray ink on top of that. I layered the two papers together, using a little washi tape to hold it together temporarily. I stitched the two pieces together with my sewing machine, then added some additional pieces of torn washi tape as well as some leaves I'd previously die cut that were also sitting on my work surface. Hey - maybe I'm doing a better job of cleaning than I thought - I've managed to get rid of a couple of things that were cluttering up the place!

The rooster was looking a little plain now against the collage background, so I decided to pull out an old Stampin' Up! background stamp to add some detail to it. I randomly covered the stamp with Distress Pumice Stone & Black Soot. Then I sprayed a little water on the stamp before pressing the rooster over it. I really like the way it turned out, and it seemed to work better with the background now.

I used acrylic matte medium to glue down the greenery and the rooster and put everything under a telephone book to dry for a while. Then I spread some adhesive all over the back of the completed collage and glued it to a plain brown kraft bag. That also went under the phone book for a while until completely dry.

I hope you enjoyed today's project - I know I did! I'm linking this to the March Take It Make It Challenge over at Craft Stamper.

Immi
Wednesday, March 4, 2015

Dot Flower Background

Here's the second card I made today (to see the first, click here).


This card uses the same background stamp - Hero Arts Dot Flower. This time, I stamped with Versamark on white cardstock and embossed with white powder. Then, I used Barn Door, Ripe Persimmon, and Wild Honey Distress inks, applied with blending tools. The embossing resists the ink and stays white - I really like this look! (Here is a link to the image that inspired me.) This was adhered to a white cardstock base.

Next I cut a couple of tags using Tag Collection dies from Alterations. I edged them with some Distress Ink in Peacock Feathers. I also used a couple of vellum die cuts from the Spring Greenery die from Alterations. The blue flourish behind the tags is cut from glitter paper from Die Cuts With a View, using a file that I downloaded to cut with my Silhouette Cameo.

The sentiment is from a small set (I don't remember the name), and is stamped with Versafine Black Onyx and embossed with clear powder. 

The glitter flourish and tag were glued down to the background with dots of Glossy Adhesive. (Before gluing the tag down, I tied a little bit of twine through the hole at the top.) I used a little Matte Medium from Ranger to attach the vellum leaves just at the base of the stem, and also used the same medium to glue down some colorful sequins. Everything was then weighted down under a book for a little while to be sure it dried in place.

I'm linking this card up with the Hero Arts Nature Challenge, the Simon Says Stamp Girly Challenge, and Virginia Lu's All Things Embossed.

Hope your week is going well!
Immi

Monday, November 24, 2014

Christmas Tag Card

Although I usually don't make my own Christmas cards, it's easy to find inspiration this time of year. I have some new stamps that I won in a drawing (Winter Wonderland by Winnie & Walter) and wanted to try them out:


I started with a plain manila tag, colored with Broken China distress ink and a blending tool. I inked the tree stamp with Peeled Paint Distress Ink and spritzed it lightly with water before stamping over my blue background. After heat setting, I mixed up a little white acrylic paint with water and flicked it over the tag with a paintbrush to create a snowy effect. 

The stag was stamped with Ranger's Potting Soil Archival Ink and coated with clear embossing powder while wet. After heat setting, I poured on additional embossing powder and heat set it again for a nice, smooth look.

I wanted to layer some papers behind the tag, so I chose a red plaid and cut it into a tag shape. The white paper with green dots is a Project Life journal tag which came printed with grid lines. I stamped the dots using Penny Black's Dots in Space stamp and Peeled Paint ink, then cut it into a tag shape. After punching holes in my homemade tags, I tied them behind my stamped tag using some dark red sheer ribbon.

The white panel behind the tags started as plain white cardstock. I used Ranger's Texture Paste through a Prima chevron stencil, then sprinkled some iridescent embossing powder over that. I let it sit for a few minutes and then heat set it.

The sentiment is inked with Potting Soil and embossed with clear powder. I colored the white cardstock with Aged Mahogany Distress Ink and a blending tool, and cut the banner shape by hand.

Everything was adhered to a dark brown cardstock base, cut to be a top folding card.

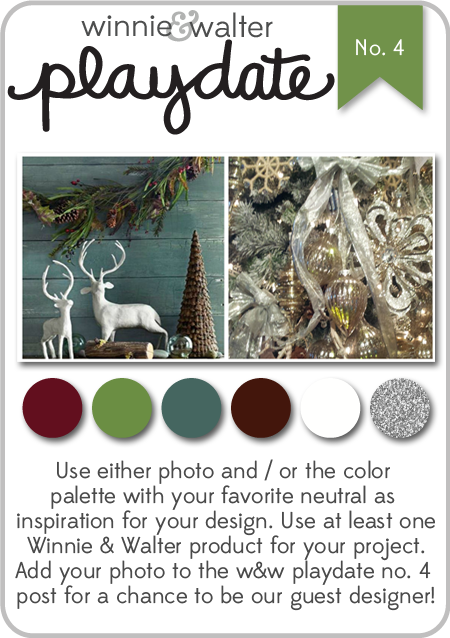
I'm linking this card up to two challenges: Winnie & Walter Playdate #4 and Muse Challenge #95. I pulled inspiration from both of these challenges to make my card. My colors I chose from the Winnie & Walter image:

w&w_playdate4_oct2014
Winnie & Walter Playdate #4

The idea of layered tags came from the Muse image:

Muse Challenge #95

I hope you have a great time this week, enjoying Thanksgiving with family and friends!

Immi
Thursday, November 6, 2014

Simon Says Stamp Flickr Challenge #5

I had some time this week to see what was going on with the Simon Says Stamp Flickr group. The current challenge is to use embossing - something that's lots of fun. I used two types of embossing on this card - dry embossing with a folder and heat embossing. The main rule with this group is that all projects must incorporate products designed by Simon Says Stamp. I have a few of their sets, so I got busy.


I started with a white cardstock panel that I'd used to practice blending Distress inks. Hopefully you can see that the color moves from dark to light. That was done by blending three colors of Distress inks (Faded Jeans, Broken China, and Tumbled Glass) using the Distress blending tool. It took some time and more than one application, but I finally got a nice smooth transition. I ran that through my Big Shot with the Distressed Frame embossing folder by Sizzix. Then I added some Pumice Stone and Peacock Feather Distress inks around the edges to bring out the raised, embossed area.

Peeking out from behind the heart is a white rub-on from Me & My Big Ideas. It was a bit of a bear to get rubbed on properly, but I finally managed.

The heart is from SSS Music 2 My Ears. I stamped with Versafine Black Onyx and embossed with clear embossing powder. I used some Dried Marigold Distress ink around the edges, and added foam tape to the back.

The flowered paper is from a 6 x 6 pad called Vintage Bliss Paper by Simple Stories. I cut a small strip and stitched it down to the blue panel. 

The gray banner at the bottom was originally a white strip of paper that I colored by pressing Simon Says Stamp Fog ink onto it. I stamped the sentiment, pulling stamps from a couple of SSS sets - Big You and Hello, You. I darkened the edge with Faded Jeans and added three crystal gems.

Finally I was ready to pull everything together. I wrapped some peach silk ribbon a couple of times around my hand to form loops, and taped that down to the blue panel. The heart was placed on top and the gray banner at the bottom. The completed blue panel was adhered to a white card base.

Sometimes when I look at a stamp set I have no idea what to do with it - I just draw a blank. That was the case with the Music 2 My Ears set. I wanted to use it, but nothing was coming to me. I did a Google image search and found a lovely card that got me going. Here it is:

Inspiration Image

If you'd like to see the original post, please click on the photo's caption. It should take you there.

Happy crafting!

Immi


Monday, November 3, 2014

Challenge: Anything Goes

Last week, the Wednesday Simon Says Stamp challenge was the wide open theme of "Anything Goes". I had just made a card  that I thought would work for this challenge, but today is the first chance I've had to post it.


This came about as a result of an experiment. I had seen a technique that I thought looked interesting and wanted to give it a try.

I took some off-white cardstock and, using a brayer, layered Distress Ink in Mustard Seed and Barn Door. I then spread on some acrylic medium by Golden called Coarse Garnet Gel. If you look closely, you can see bumpy spots, which are the grit embedded  in this gel. The grit is a dark red color, while the body of the medium is clear. I had no idea how this would turn out, but I thought it was very interesting. The colors of the inks stayed true and were even intensified, and the grit in the gel added texture. I left it to dry overnight - the next morning it was dry but the cardstock was rather flexible. I wasn't sure what to do with it at that point, but I decided to make a card background with it. I trimmed a little off the edges and adhered it to a green card base.

The pear stamp is an oldie from A Stamp in the Hand. It's a very solid image with little detail, so it works well for blending colors. I used several Distress Ink colors in the mini pads and then spritzed it with water. I stamped onto some watercolor paper and added a few splotches of color with watered down ink.

I trimmed it pretty close, tearing the bottom edge of the panel and mounted it onto some dark brown paper. I added some foam adhesive (3M) to the back and set it aside for a moment. I cut a length of twine and looped it around my fingers, then placed it on the card front with the foam mounted pear panel on top. The foam adhesive holds the twine in place.

The "happy birthday" sentiment is from Altenew's Label Love (I'm using that set a lot lately!). I've discovered that these stamps work best for me if I stamp on a surface with a little give, like a pad of paper. I used a teeny bit of foam adhesive on the far right side of the sentiment strip to bring it up to the level of the pear panel. Otherwise it would have been hanging in mid-air and probably would have gotten bent out of shape.

I thought the card still needed a little something, so I found a dark brown button and threaded it with a little gold metallic thread, then glued it on with some Glossy Accents.


This next card has nothing to do with the challenge, but it's so similar I thought I'd include it. The background was made with a checkerboard stamp, inked with Distress Ink and misted with water. It was stamped on some watercolor paper and trimmed a little smaller than the card base.

The pear was done exactly the same as the previous card and also mounted on dark brown paper. I wrapped some twine around the checkerboard panel, and added a die cut "p" just for fun.

That's it for today. I hope your week is off to a good start!

Immi

Thursday, October 23, 2014

Muse Challenge #90

I stumbled a cross a new challenge blog this week and decided to participate. The blog is called Muse: A Cardmaking Club. I liked the bright colors of the challenge card as well as the design. Here it is:


I immediately thought of a Tim Holtz stencil I've got called Rays. I got out a piece of watercolor paper and taped it down to my craft sheet so it wouldn't move around. I taped the stencil on top (painter's tape works well) and also used some strips of tape to mask off adjacent rays so that the colors would stay where I intended them to go. I did all the yellow first, using Mustard Seed Distress Ink. Then for the red rays I used Barn Red Distress Ink. 

The stencil is a narrow one, and it didn't work to use it to duplicate what you see in the photo above. I ended up cutting the paper in half lengthwise after stenciling it. I paired it with a strip of bright red cardstock and adhered both pieces to a card base. To cover the spot in the middle where the pieces join, I cut a thin strip of black cardstock and glued that down.

I found a small black tag in my stash, and decided to use that with a word from a new die cut set I just bought - it's by Tim Holtz and has lots of Christmasy words. I die cut the word "wishes" four times from bright blue cardstock and glued the layers to each other to make it thicker. I coated the word with my clear Wink of Stella pen and added Glossy Accents on top of that.

Next I got out the Label Love set by Altenew and stamped "Just for You" in Stampin' Up turquoise ink. I stamped the same thing in Versamark on top of that and added  clear embossing powder. After heat setting the powder, I cut out the word strip and mounted in on some foam tape.

To finish it up, I found a red heart-shaped button that I added to the tag along with some blue twine (thanks to Target's Dollar Spot!).

Here's my take on this challenge:


I'm actually glad that I wasn't able to stencil the pattern on both sides of the watercolor panel. I like the way it turned out. I wish you could see the shine and sparkle on "wishes" - it looks great!

Till next time,

Immi

Wednesday, September 17, 2014

Simon Says Stamp Flickr Group Challenge

I recently learned about a Flickr group designed to showcase what others are doing with Simon Says Stamp products. I have a few of their stamp sets, so I thought it would be fun to participate. The group has just started posting regular challenges as prompts for members to use.

The first prompt is a color scheme. The instructions state that at least three of the five colors should be used. When I first looked at it, I really had no idea what to do with those colors. These are not colors I would typically work with, but that's part of the challenge.


Color Challenge Inspiration by Simon.Says.Stamp

I pulled out my SSS stamps hoping inspiration would strike. Nothing. So, I followed the advice of a well-known and very savvy stamper, Jennifer McGuire. I did a Google search on the name of one of my sets and looked at images of what others had done with this particular set. I was struck by this card:

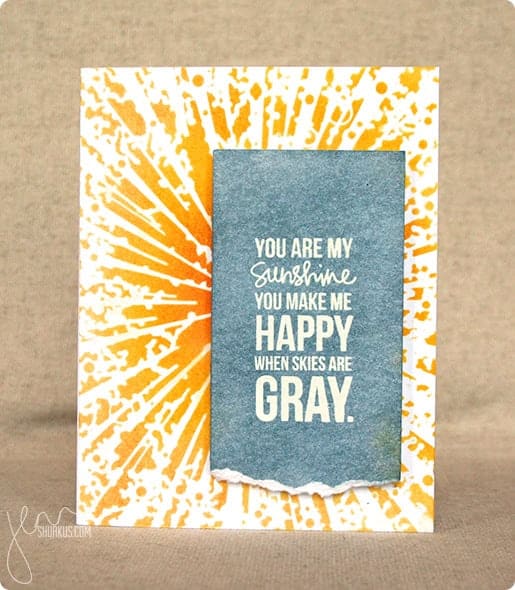
Simon Says Stamp Wednesday Challenge: Anything Goes, Memory Box | shurkus.com

I liked the white text on a gray panel against the bright yellow on the background. Using someone else's work as inspiration (in the cardmaking world) is known as CASE. Sometimes this is known as Copy And Steal Everything, but some prefer Copy And Share Everything (I'd rather think of it that way, too!). As Solomon said, there is nothing new under the sun!

Here's my card:


I started my card with a piece of watercolor paper. For the green in the color sample, I chose to use an old jar of Lumiere paint. This paint is old and has become quite thick, but it worked beautifully to spread through some stencil waste to create the green dots in the background. I did this in a random way to create interest, color and texture. After that dried, I painted over the panel with various shades of yellow watercolor and let that dry. 

Just as my inspirational stamper did, I white embossed the sentiment on white cardstock. I colored over it with Pumice Stone distress ink, using a blending tool. I dripped some water over that and let the water react with the ink. Distress ink is great for this technique! I mounted this panel onto some black cardstock and sewed around the edges with black thread. 

After trimming the edges of my watercolor paper, I used plenty of adhesive to tape it to a black cardstock base. The sentiment panel went on top of that using 3m foam tape for a little extra dimension. As a final touch, I glued down a bright orange butterfly punched from some thick textured cardstock - the same cardstock I mentioned here.

I love the finished result. This is such a sweet saying, and it means even more to me because my daughter sings this to her children. They love it, and I love hearing her sing it to them. I have enjoyed singing it myself on the occasions when I've had the opportunity to put them to bed. Makes me want to dash down there for a visit!!

Till next time,

Immi


Tuesday, September 2, 2014

Winnie & Walter Playdate #3

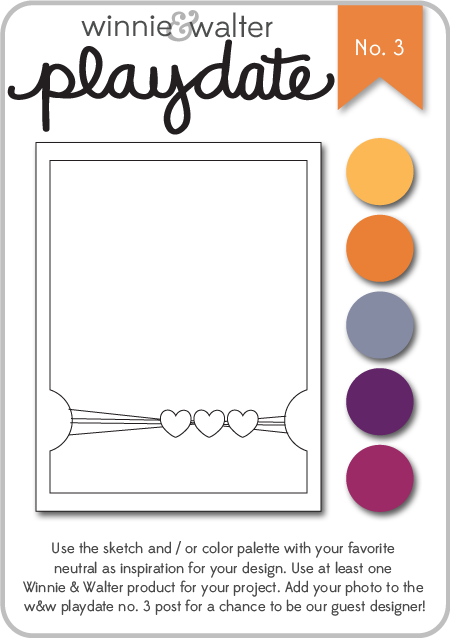
I stumbled across this challenge this evening and decided to do my best to get a card ready to participate. Winnie & Walter is a fairly new stamp company. I've been seeing their stamps used on a variety of blogs I follow. I don't own any of their stamps yet, but they also offer digital files. I downloaded a file to cut on my Silhouette, and used the sketch provided to create my card.

w&w_playdate3_august2014

I chose to use the sketch along with some of the suggested colors. Here's my card:


I started with a kraft cardstock base. On top of that is a layer of an orange sunburst paper that I edged with Worn Lipstick Distress Ink. The purple layer is a scrap of cardstock I had that I coated with clear embossing paste, using a stencil from Jenni Bowlin. After that dried, I punched out the half circles, and used the Worn Lipstick again around the edges. The "hello" is the digital file I downloaded from Winnie & Walter. I opened the file on my Silhouette and discovered that I didn't know how to cut a png. I had to get on the web to do a little research, but found it was quite easy after all (sigh of relief). I cut it from a pink patterned paper from a Colorbok paper pack - Light Bright. That's also where I got the orange starburst paper. I wrapped some thin gold cord from my stash around the card, creating some loose loops. I glued the loops down with Glossy Accents, also using that to attach the flower and button. For the "hello", I used teeny tiny drops of Glossy Accents to be sure it would stick to the embossed paper beneath. Finally, I used some Scotch 3M Mounting tape to attach the purple panel to the cardfront. This gives it a little extra height which is kind of cool.

I don't know why I create these situations for myself, but I was bound and determined to submit this - the deadline is later tonight. I'm happy with my result and I guess that's what counts the most!

Till next time,

Immi