Showing posts with label Kraft cardstock. Show all posts

Wednesday, November 12, 2014

Getting in the Holiday Mood

I have a couple of projects to share for this week's Monday challenge from Simon Says Stamp.

First is a card I made, inspired by this card.


I started with a kraft cardstock panel. I stamped the sentiment first to be sure that the snowflakes would fit around it. I combined snowflakes from multiple sets (Stampin' Up! and Inkadinkado) so that each one would be different. I used a silver pigment ink and covered that with silver embossing powder. After heat setting, I wanted to use some kind of thread or ribbon to make the snowflakes look like hanging ornaments. I remembered that I had some thin silver cord, so I tried that. I put down tiny dots of Glossy Accents to hold the ornament strings in place, then tied teeny little bows and glued them above each snowflake. I put a heavy book on top until everything dried. Then I wrapped the cord to the back of the panel and taped it down. The stamped panel was mounted onto a navy card base. I was surprised how quickly this came together. In retrospect, though, I don't know if I'd use the silver with kraft again. I'm not sure there's enough contrast. Live and learn, I guess.

Next is an ornament:


To make this, I cut a scalloped circle from watercolor paper using a die set from Spellbinders. The stamp I used is an old one from Stampin' Up! that I've had for many years. I used Versafine Black Onyx ink and embossed it with clear embossing powder. To color the image, I used Distress Inks diluted with water and some Stampin' Up! markers in a few spots.

I cut three more scallops and glued them all together, using a book to weight it down until dry. I decided to run a Versamark marker around the edges and dip them in silver embossing powder. I really like the way that turned out. Then I used a bookbinding tool to punch a small hole in the top and used some of that thin silver cord to make a hanging loop.

That's it for now. I hope your week is going well!

Immi


Tuesday, September 2, 2014

Winnie & Walter Playdate #3

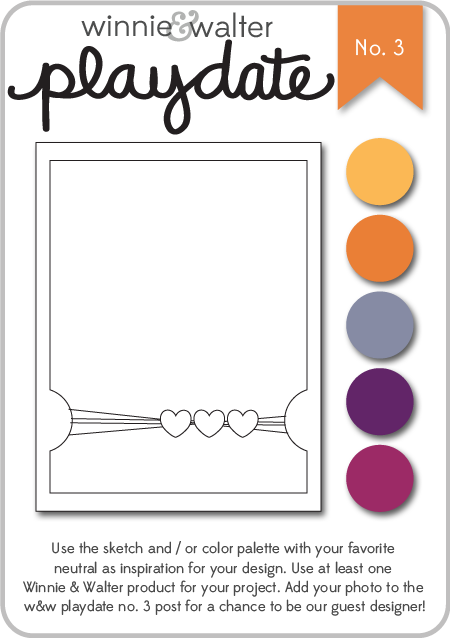
I stumbled across this challenge this evening and decided to do my best to get a card ready to participate. Winnie & Walter is a fairly new stamp company. I've been seeing their stamps used on a variety of blogs I follow. I don't own any of their stamps yet, but they also offer digital files. I downloaded a file to cut on my Silhouette, and used the sketch provided to create my card.

w&w_playdate3_august2014

I chose to use the sketch along with some of the suggested colors. Here's my card:


I started with a kraft cardstock base. On top of that is a layer of an orange sunburst paper that I edged with Worn Lipstick Distress Ink. The purple layer is a scrap of cardstock I had that I coated with clear embossing paste, using a stencil from Jenni Bowlin. After that dried, I punched out the half circles, and used the Worn Lipstick again around the edges. The "hello" is the digital file I downloaded from Winnie & Walter. I opened the file on my Silhouette and discovered that I didn't know how to cut a png. I had to get on the web to do a little research, but found it was quite easy after all (sigh of relief). I cut it from a pink patterned paper from a Colorbok paper pack - Light Bright. That's also where I got the orange starburst paper. I wrapped some thin gold cord from my stash around the card, creating some loose loops. I glued the loops down with Glossy Accents, also using that to attach the flower and button. For the "hello", I used teeny tiny drops of Glossy Accents to be sure it would stick to the embossed paper beneath. Finally, I used some Scotch 3M Mounting tape to attach the purple panel to the cardfront. This gives it a little extra height which is kind of cool.

I don't know why I create these situations for myself, but I was bound and determined to submit this - the deadline is later tonight. I'm happy with my result and I guess that's what counts the most!

Till next time,

Immi